

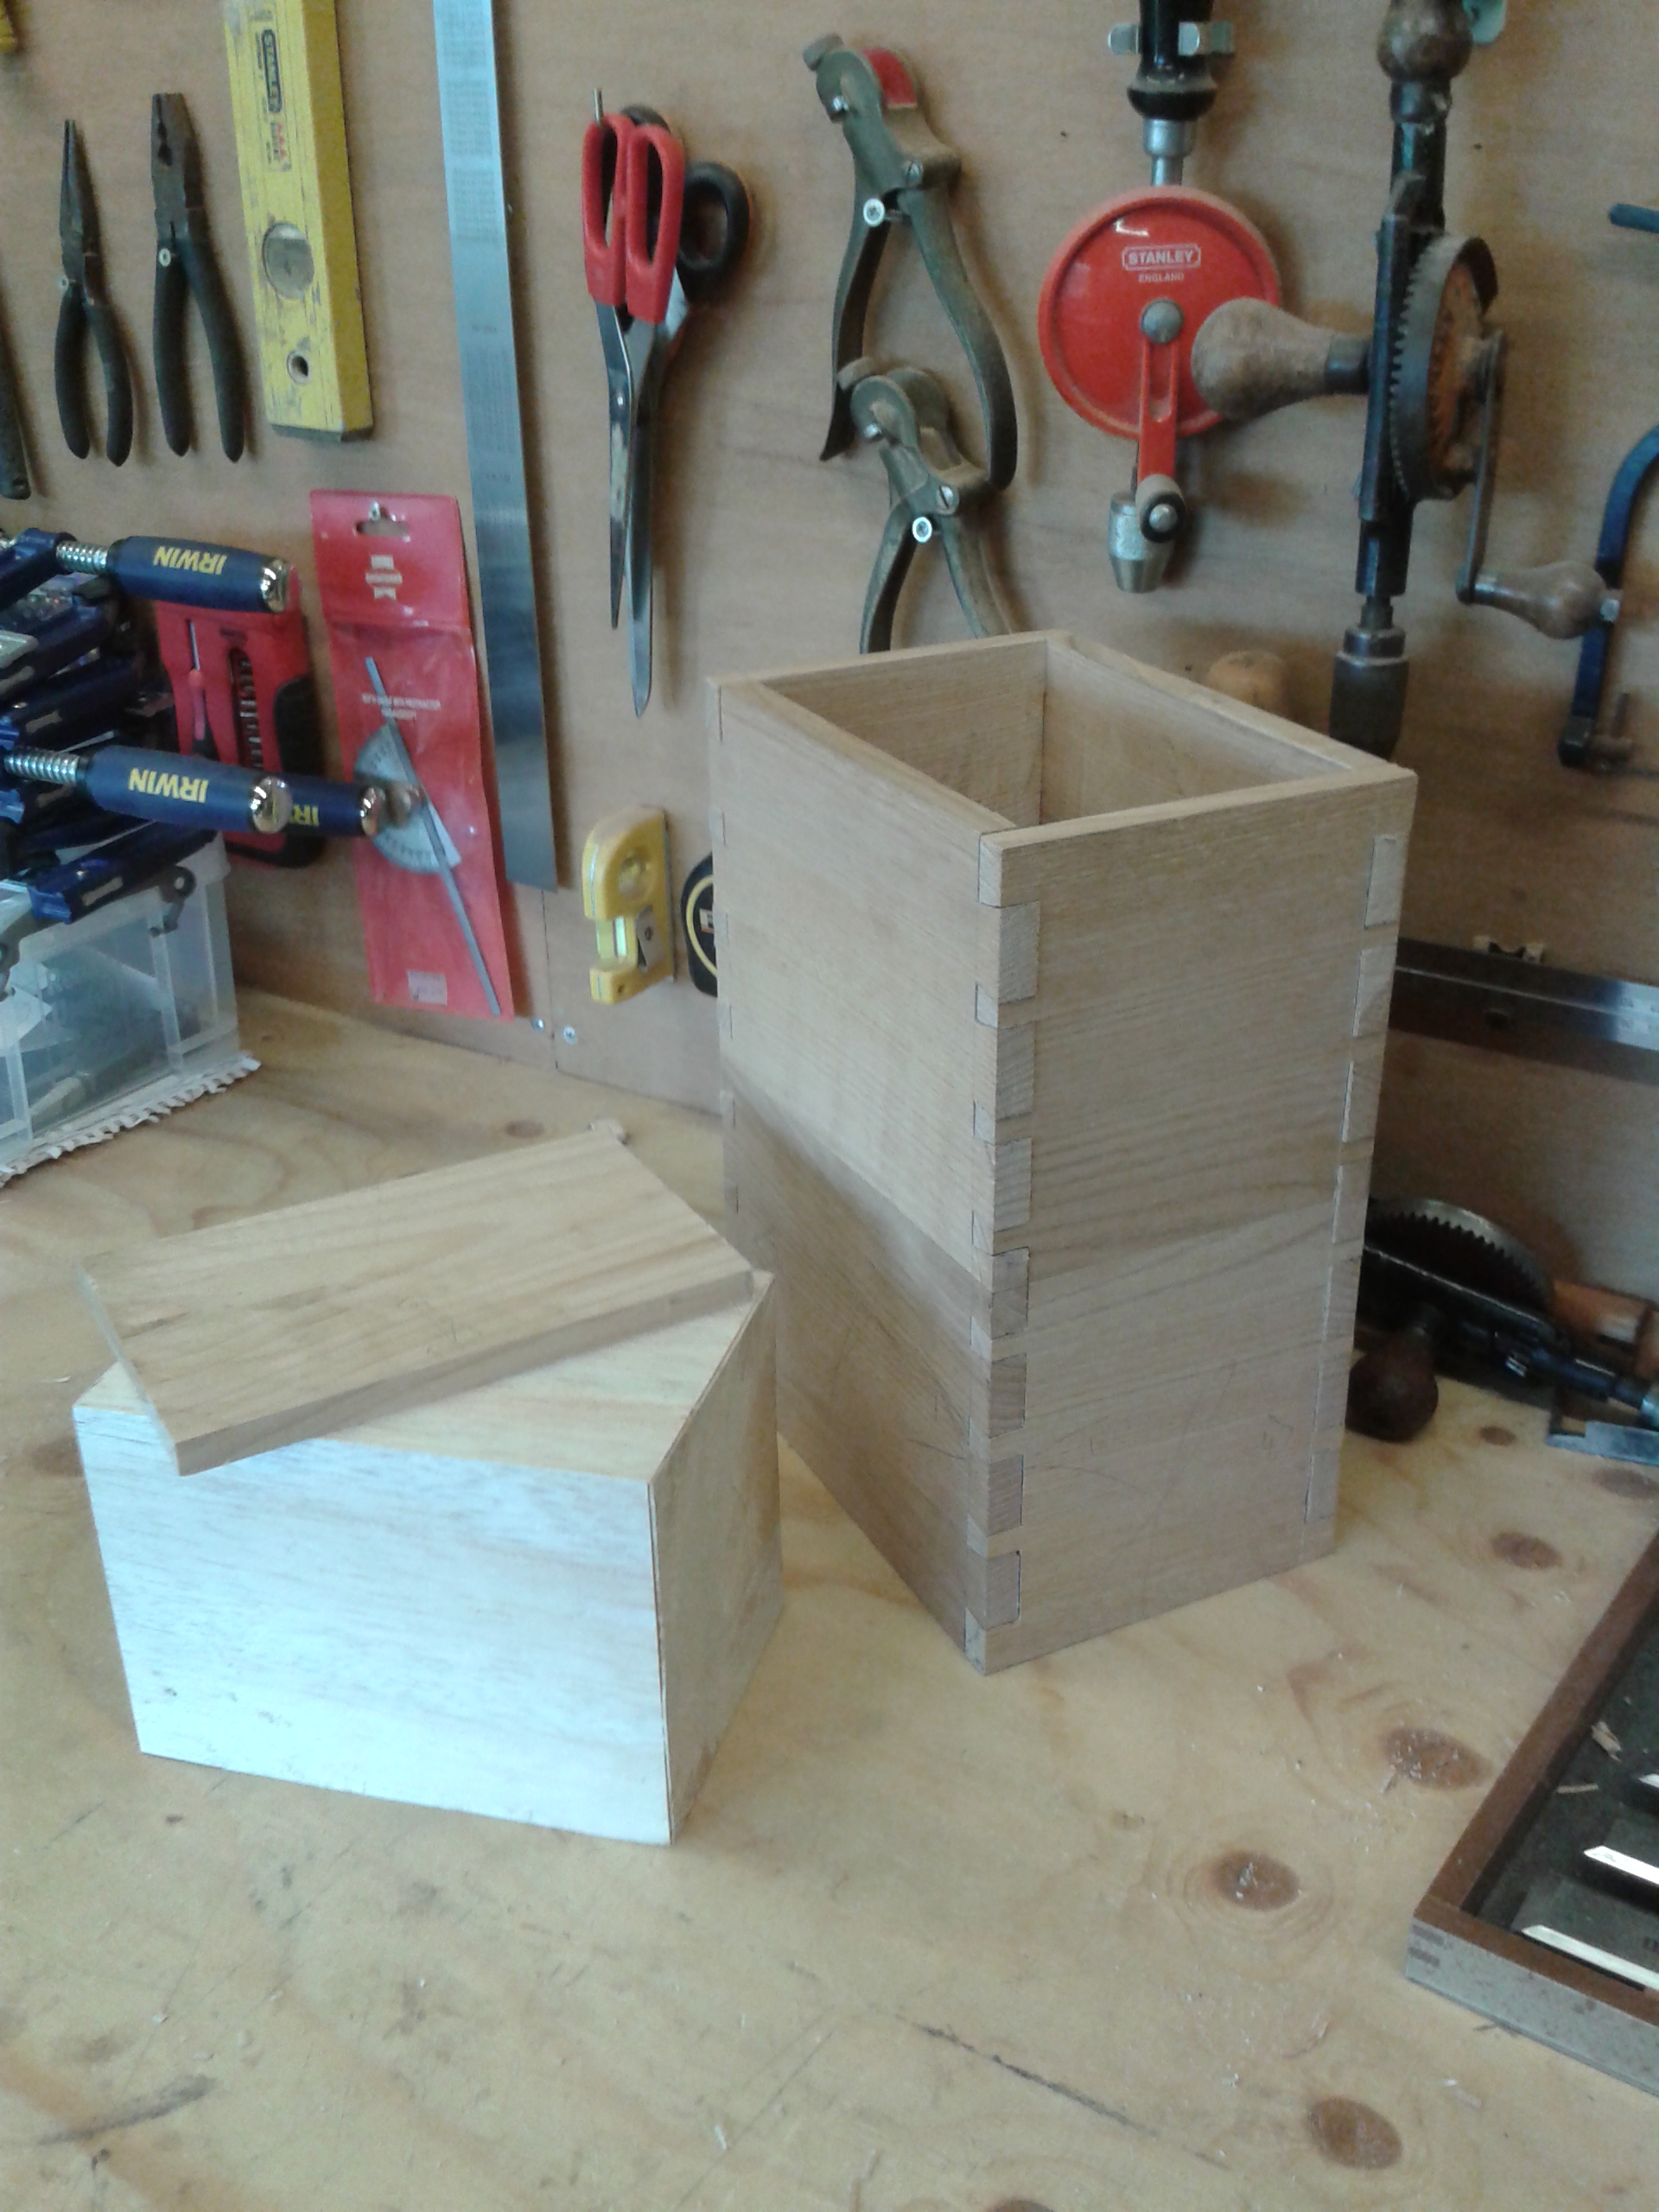
After a great deal of thought into the design of my auger box, I was faced with a choice between a flat box, rather like the one I built to house my mortice chisels, and a tall box which would store the augers in an upright position. Since the flat box was something I had already built, and since it would need several spring clips (30+) to hold the augers in position, I decided on the tall box. The design I came up with was a dovetailed box with a lid cut at an angle, the lower half of the box being solid with a series of holes to take the augers. I wanted to keep the weight down so I decided to use balsa for the majority of the solid core, topped with a panel of the same material as the box itself, which in this case is chestnut.
 The first job was to figure out how big the box needed to be. To do this, I drew a series of circles with diameters corresponding to those of the augers, leaving about 3/8″ gap between them. The circles were arranged in a rectangular pattern, with a ½” border around them. For the smaller augers, the square tapered tang was wider than the flutes, so I made sure that the holes for nos #4 – #9 were of the same diameter – nos #10 onwards had flutes wider than the tang, so they could have holes that were just the right size.
With my template made, I now had the approximate internal dimensions for the width and depth of the box, and the overall height was governed by the length of the longest auger. The next step was to make the solid core.
Many years ago, my father designed, built and flew scale model aeroplanes, and balsa wood was the obvious choice of building material, since it is so light. One day, a family friend turned up, having come across some large pieces of balsa that had been used as packing material (in those days balsa was used in situations where polystyrene might be used today). Apparently, there were about half a dozen 2″x4″x3′ lengths in all, most of which were subsequently resawn with a bandsaw into more suitable dimensions for model making. When I mentioned to my dad that I needed some blocks of balsa he went rummaging in his loft and came back with the only remaining pieces from that long forgotten haul. Since he had no more use for them he let me have them for my box.
Using my template as a guide I laminated a few pieces of the balsa together to make a larger block and then planed it down to its final dimensions. This was surprisingly difficult, because although it is the weakest and softest of the hardwoods, balsa is very difficult to work with a hand plane. I’m not really sure why, but it seems to take the edge off tools very quickly and I found that I was constantly having to stop to hone my plane iron.
 With the core done, I turned my attention to the box itself. I had recently acquired a piece of gnarly old chestnut that was not much use for anything else, so using my Kerfing Plane and Frame saw I resawed it to ½” stock. I cross-cut two pieces for the top and the base and edge jointed the rest so that I had wider panels for the sides of the box. I did this so that I could have the grain running in the right direction for the dovetails. From an offcut, I also made a small panel to go on top of the core.
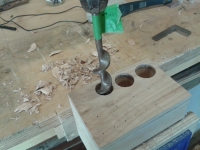
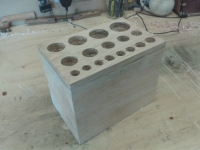
With all the components of the box planed and cut to the correct dimensions I cut my dovetails and glued and assembled the four sides of the box. Making sure that the core fitted snugly inside (a few shavings here and there saw to that) I glued the panel to the core and, once dry, used my template and an awl to mark the centre of each hole. It was then a simple case of using the augers to make the holes they would eventually live in.
The core was then installed into the box, just with a friction fit, and the top and base glued on. Then came the most difficult part – cutting the lid.
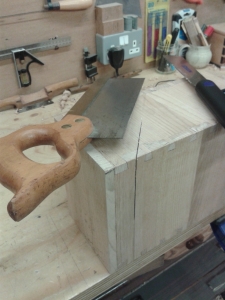 I began by marking the line where the hinges would go – this was the glue line from where I had edge jointed the side – and because this was in the middle, it neatly bisected the centre tail. Next I marked out the opposite face, bisecting the top tail. I stopped and thought about
 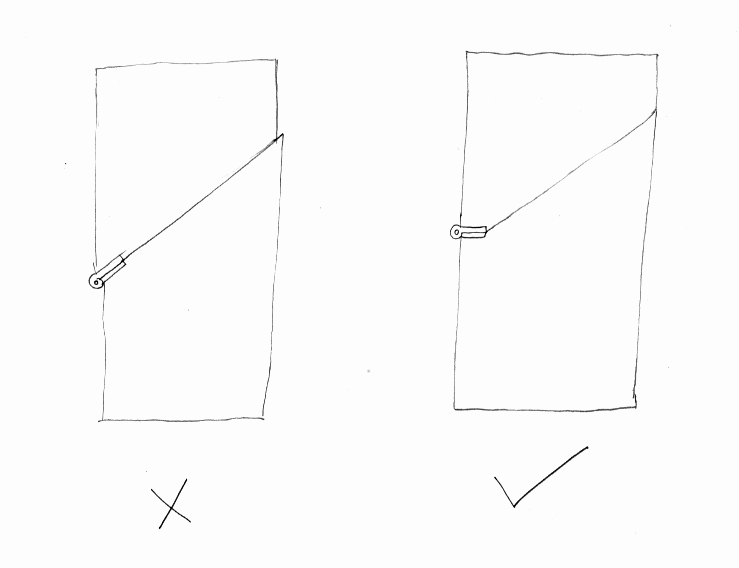 the situation and quickly realised that I couldn’t just join these lines diagonally as this would affect how the hinges sat – the hinges needed to be perpendicular to the side of the box (see diagram – click to enlarge) otherwise the closed lid would have been slightly offset from the box. I needed to cut the hinge line at 90º, and then I could join things up diagonally. I really took my time over this as one false move and I’d risking cocking up the whole project.
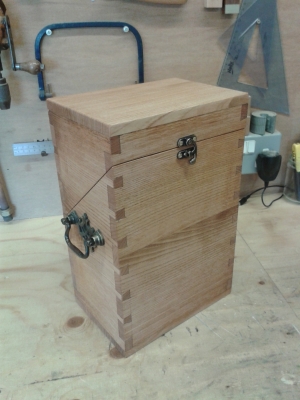
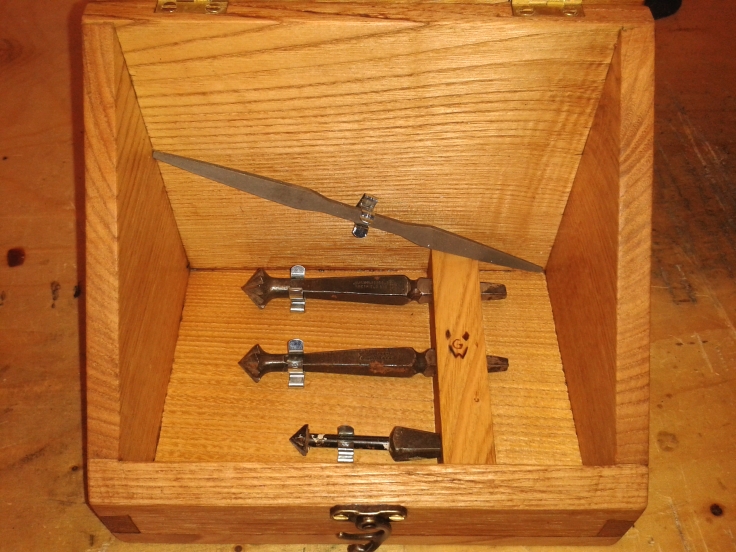
With the tw o parts of the box separated I ran a plane over the rims and made sure they seated properly, before fitting the hardware which, in this case, consisted of two brass hinges and a catch, and three spring clips in the lid to hold some countersinking bits. The spring clips work in conjunction with a block of chestnut with three holes drilled through it – this block was a good place to brand my mark. As an afterthought, I fitted two brass handles that I’d salvaged from an old chest of drawers a few years ago – these make it much easier to move the box around.
A final light sanding to provide a good key and it was on to the finish, which was three coats of my homemade oil/wax blend. A few days after the project was complete I took delivery of an auger bit file, so I decided to clip this into the lid as well. I had to put it at an angle because it was slightly longer than I was expecting.

All in all, I’d have to say that this is not my finest work. I realise that I don’t have a great deal of experience with dovetailing, but these dovetails were a real struggle and at times I felt as if I was going backwards. I will probably do some more soon, just for practice. Also, if I was attempting this again I would probably pay more attention to the direction of the grain when edge jointing the sides. Having said that, this box is not intended to be an ornament – it is workshop storage – and I kind of like the shabby look and feel it has.
Well, that’s it for another project. Take it easy.
gb

I think it looks pretty slick. I like that it only requires one hand to use and stores sharpener and countersinks. I’m fixing up an old writing slope with a similar basic configuration and can appreciate why fitting the hinges is challenging.
LikeLike
Cheers Paul
LikeLike
I don’t think it is shabby at all, look great. Great idea, I may do something like that, my bits need proper storage as well.
Cheers
Bob
LikeLike
Thanks Bob
LikeLike
Nice design! I can see myself making one in the future – thanks!
LikeLike
Beautiful design. I think your dovetails are great!
LikeLike
Thanks Jon
LikeLike
I sure would like to know where you found your spring clips!!! I have spent hours on the internet and can’t find them. What is your source?
Thanks!
LikeLike
Hi Tina. I bought them from a local store. Sorry
LikeLike