
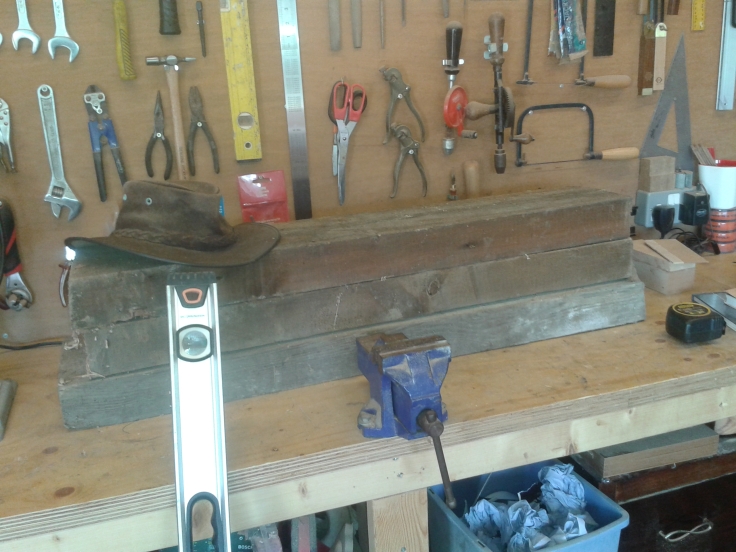
Late last year I put in a few days labouring work for a friend who was demolishing an old timber house so that he could build on the site. A lot of the timber was rotten, and he was saving most of the good stuff for his wood burner, but he let me have a couple of pieces and I earmarked them for my bench legs.
 The plan was to get three legs out of one of the pieces, and one leg out of the other.
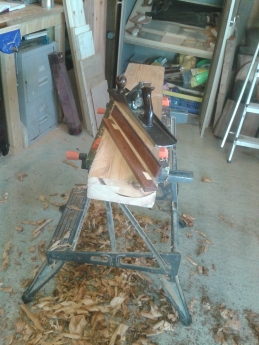
With t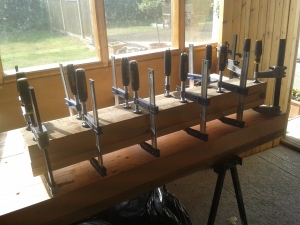 he legs roughly cut to length I began by planing reference faces and edges and increasing the thickness by laminating them with some old pine boards I had kicking around.
I finally came to the shorter piece, for the final leg, but as soon as I cleaned the crap off it I saw lots of wormholes. I don’t think that there was any worm still living in it but the wood was crumbly in places and so I had to chuck it and resort to laminating three lengths of 2″x4″ for the final leg.
Once all the legs were planed down to their final dimensions (approx. 5½”x4″) It was time to move onto the joinery. The Roubo bench legs are joined to the bench top with two through tenons, one of which is a sliding dovetail, open on one side.
I looked at The Plans and they stipulated that the tenons should be cut first and then the mortises. This made me a tad uncomfortable because I have always done things the other way round, on the understanding that it is easier to cut something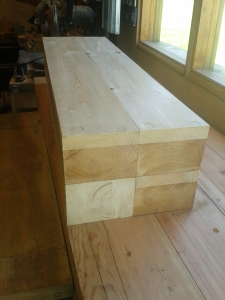 to fit a hole than it is to cut a hole to fit something. I decided to ignore the expert advice and cut each mortise first, then cut the tenons to fit.
I remember this as a nerve-wracking time. The chances of me happening upon the right sized timber to make another bench top were vanishingly small, so I knew that I couldn’t screw this up. I agonised over these joints for an embarrassingly long time, but in the end I just had to grit my teeth and bloody well get on with it!
I marked out the bench top and began by boring out for the regular tenon, cleaning up with a mortise chisel.


I then cut the sides of the dovetail at an angle of 45º and made a series of 90º cuts to make chopping out the waste easier. Next, a clean up of the cuts with a paring chisel and router plane, and I could move on to the tenons.
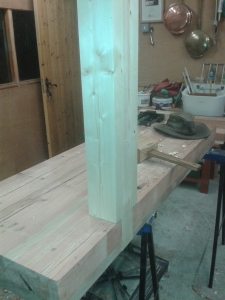
The first one went quite well, and I was pleased with the result – one down, three more to go.


Presto! All four legs done and dry fitted. Some of the joints were better than others, but all of them were better than I had expected, given that I hadn’t done anything like this before.
The next job was to mark out for the stretchers. The Plans called for timber in dimensions I just didn’t have, so I was forced to make do with some more 2″x4″‘s. But that is for the next post. See you then.


That’s remarkable, Goatboy. I think I’d have to practice that joint before committing to the real thing. Looks like it came out nice, though. Congrats.
LikeLike
Cheers Matt. Practice probably would have been a good idea. Still, sometimes it does one good to keep things edgy.
LikeLike
Wow, a mention in the blog, excellent. You should have said about the legs, you could have borrowed another bit of timber.
LikeLike
Cheers matey. It’s all good….
…erm, when you say “borrowed”, are you expecting the other timber back? ‘Cos that might be a bit tricky.
LikeLike
Yes, I am just waiting for you to finish the bench before I ask for them back!
LikeLike
Ahhh. ok. Good luck with that.
LikeLike
Great job! That mortise and tenon takes some serious intestinal fortitude to dive into like that.
LikeLike