
Once the concrete had cured for a week or two I began the task of constructing the timber frame. I used Canadian Lumber Standard (CLS) for everything. I believe it is usually used for stud-work, but it is a fantastic material for building a shed. It is supplied planed and with rounded edges and is 38mm by 89mm. I got my local timber mill to deliver it in 4.8m lengths.


Using a chop saw for speed, I made my frame one wall at a time and constructed them flat before raising them and staking them in place. This way I could do the whole thing on my own. I used a circular saw and mallet and chisel to notch out the recesses for the studs and noggins and I made my stud centres just the right width so that when I started skinning with 6mm ply, I didn’t have to make too many cuts. Once the walls were up, the whole frame was bolted down to the concrete base, and it was time to start the roof.
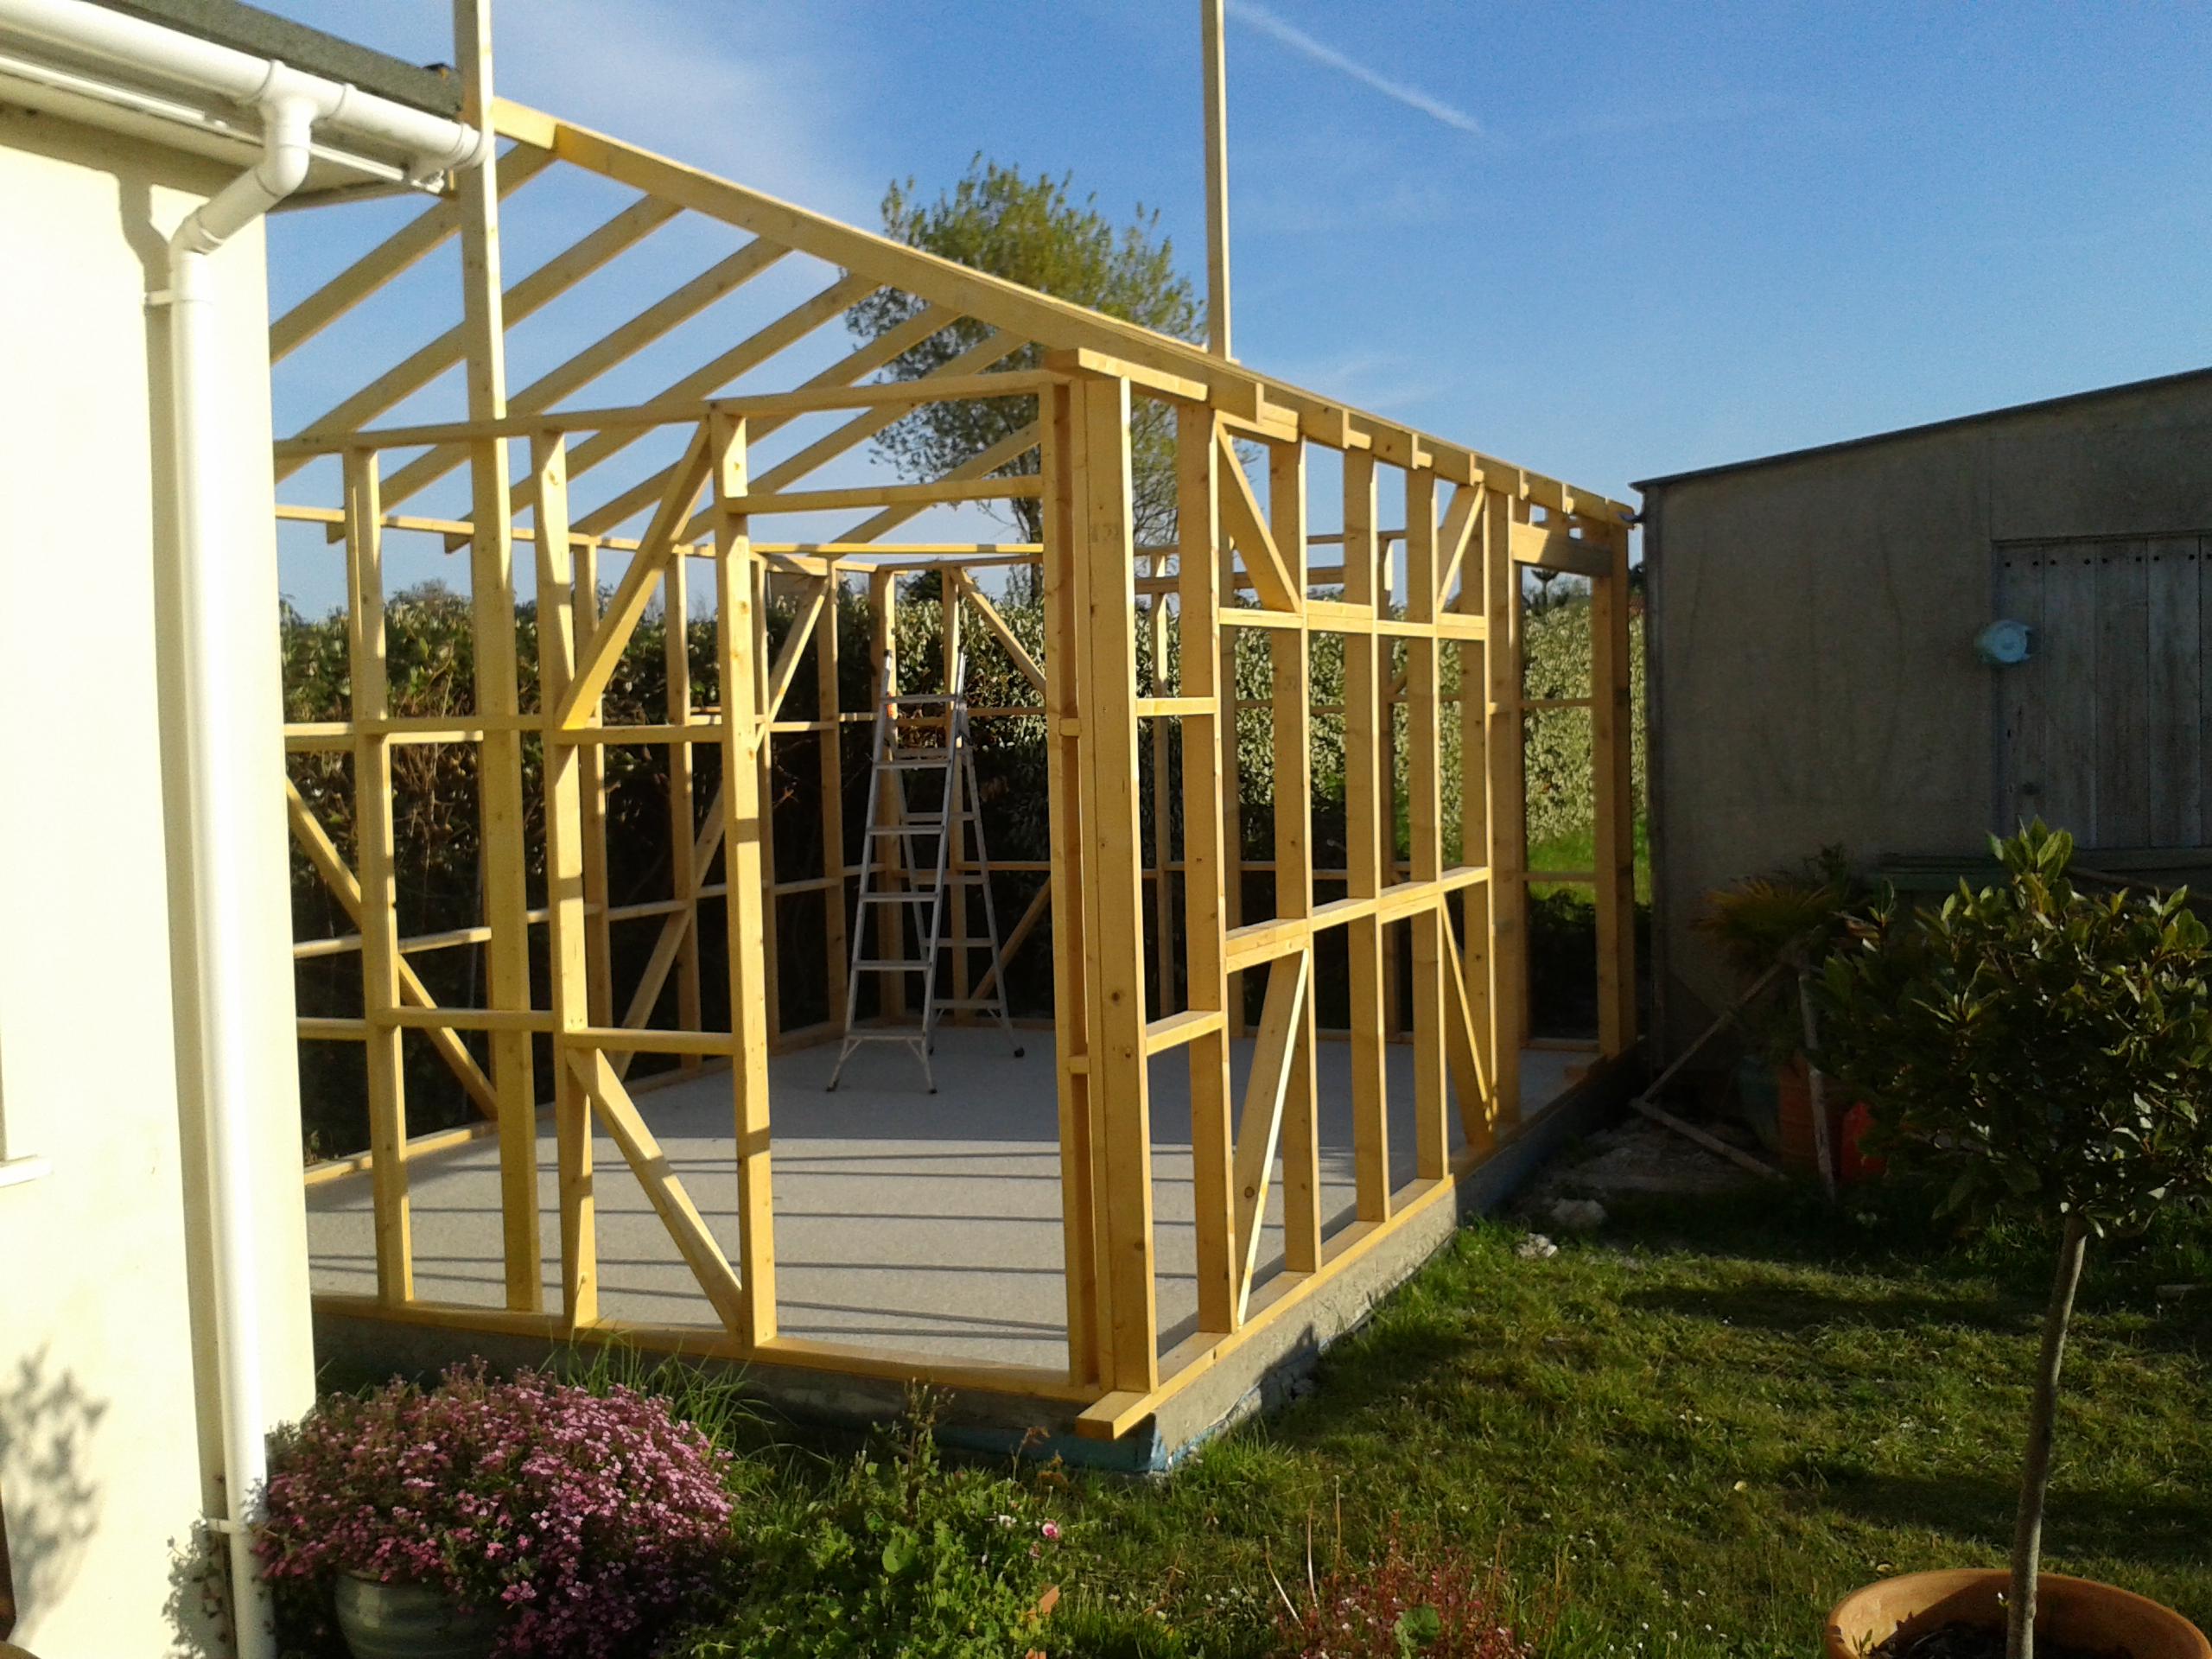
As I said, the CLS comes in 4.8m lengths so I had to scarf two pieces together for the ridge beam to span the 5.2m length of the shed. The rafters are notched onto the head-plate and diagonal braces ensure that the roof will not skew. The battens are lengths of CLS cut along their length with a circular saw.
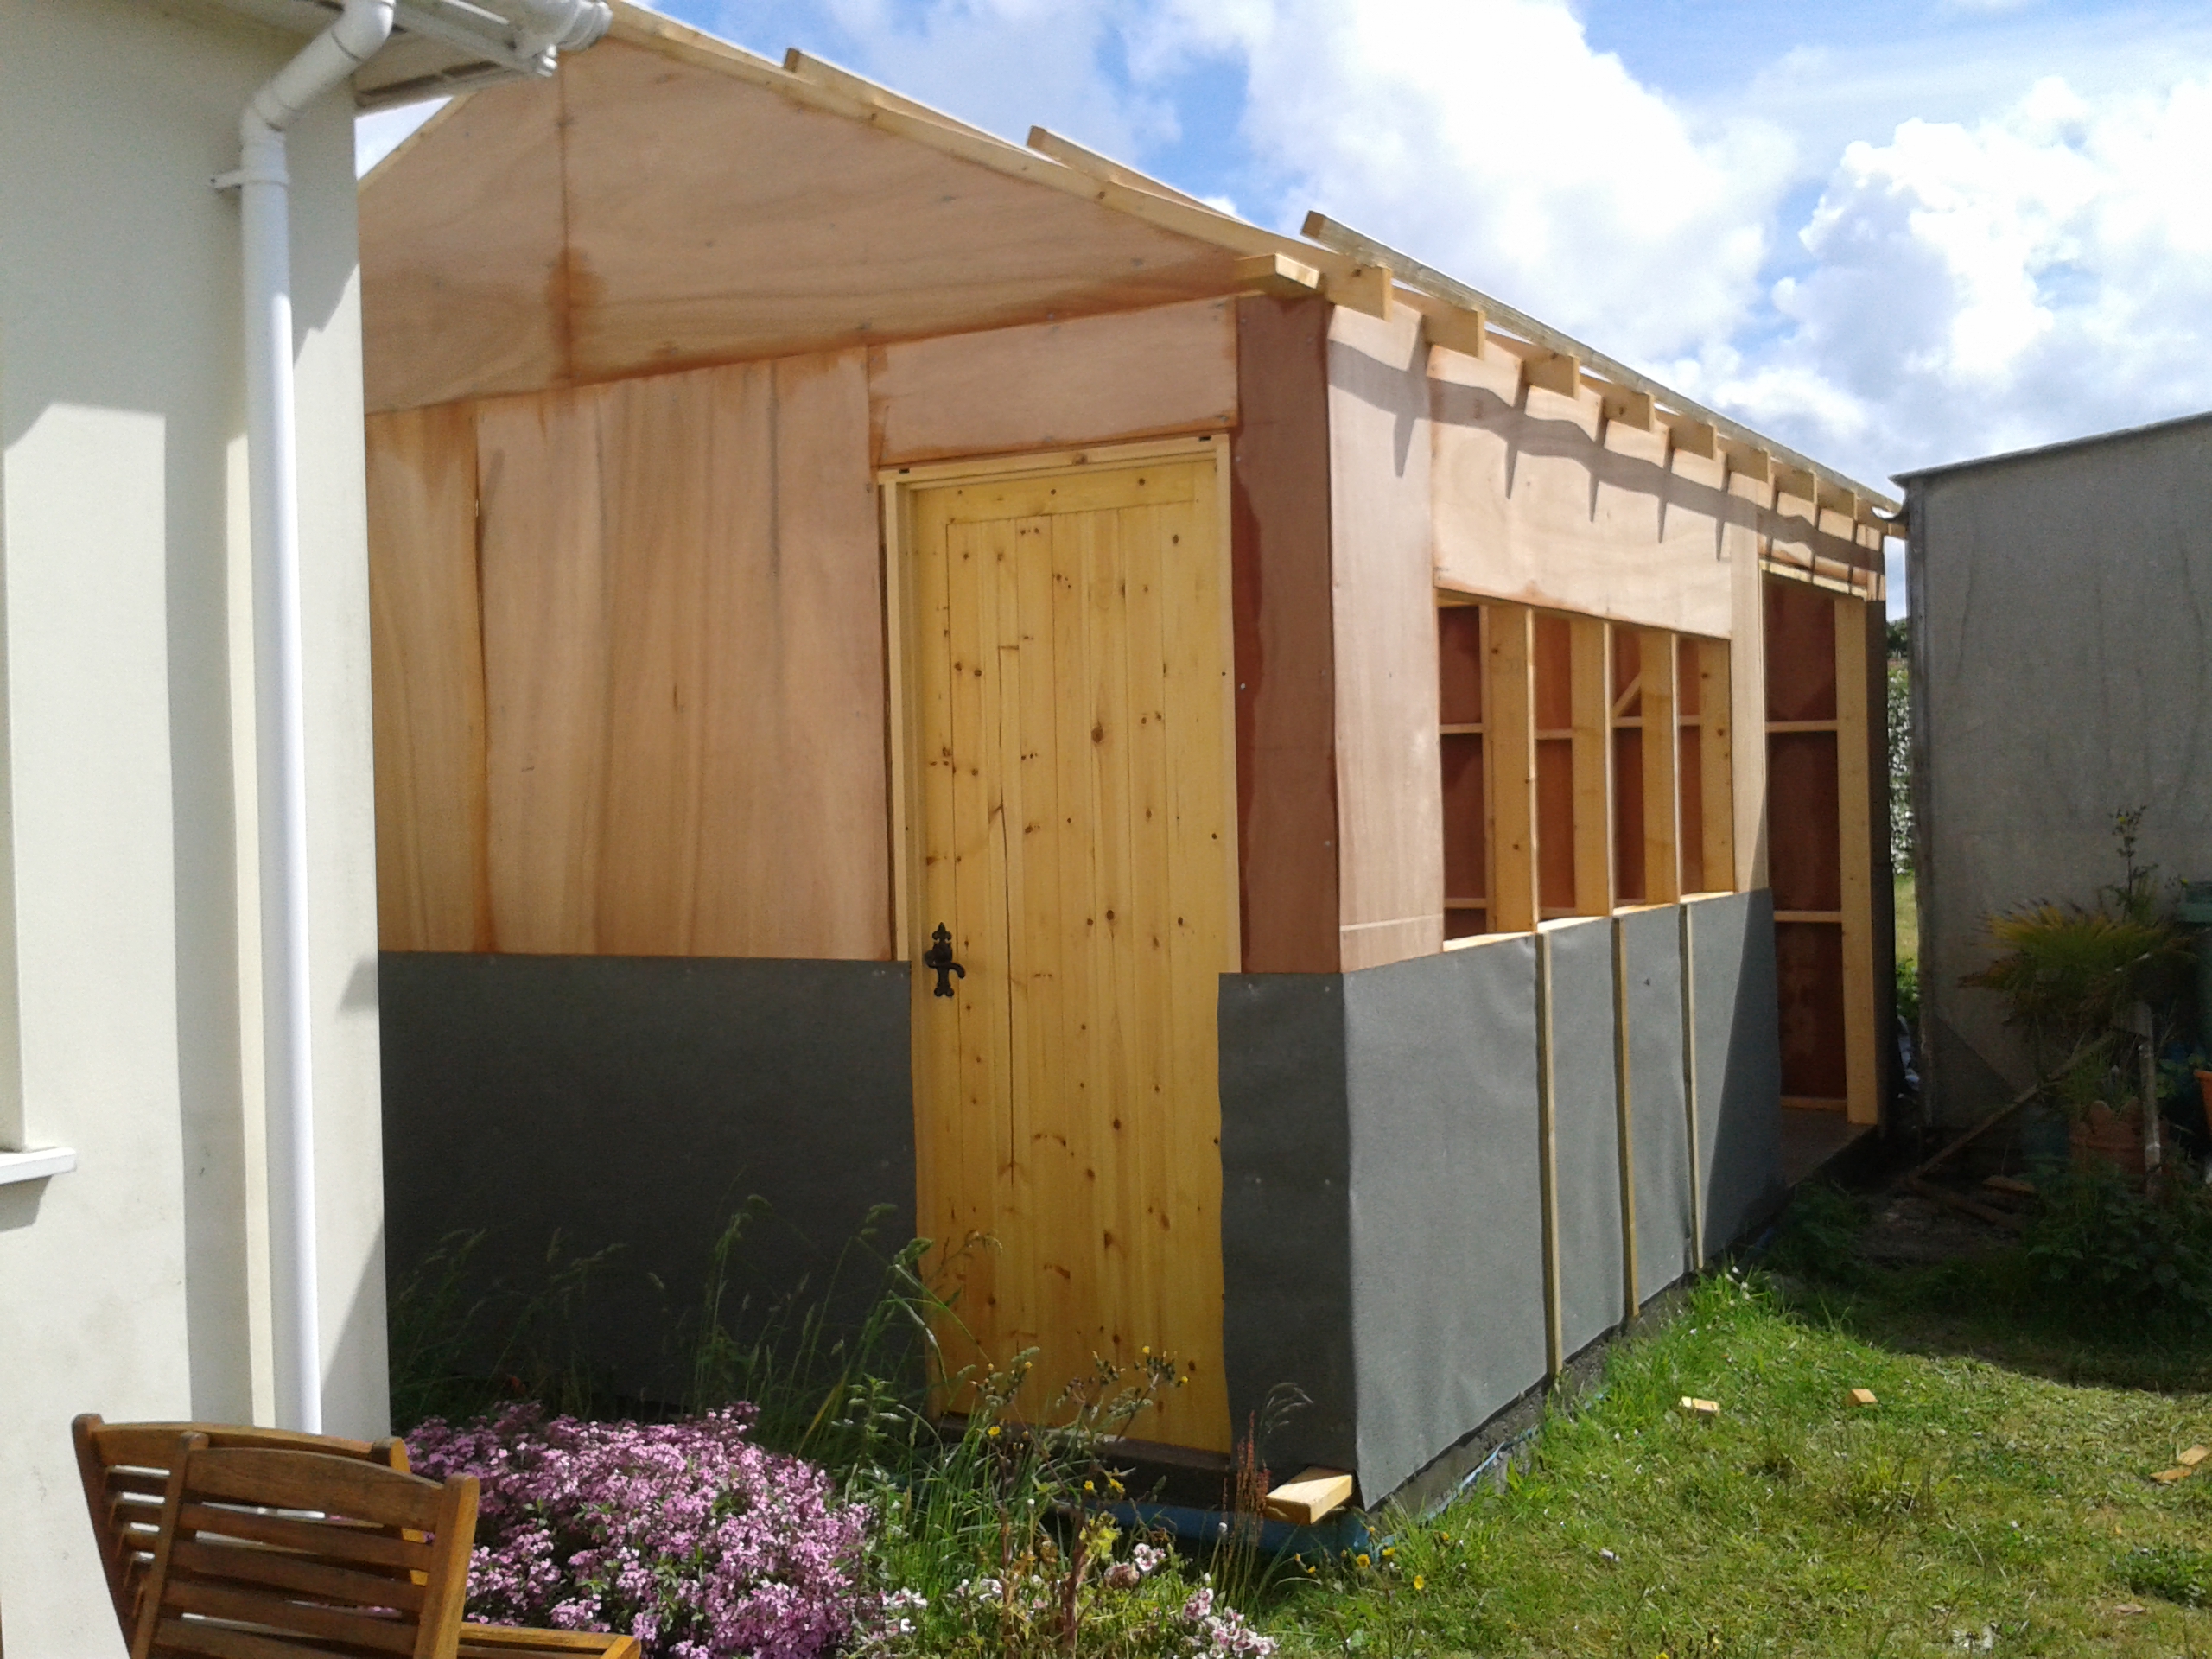
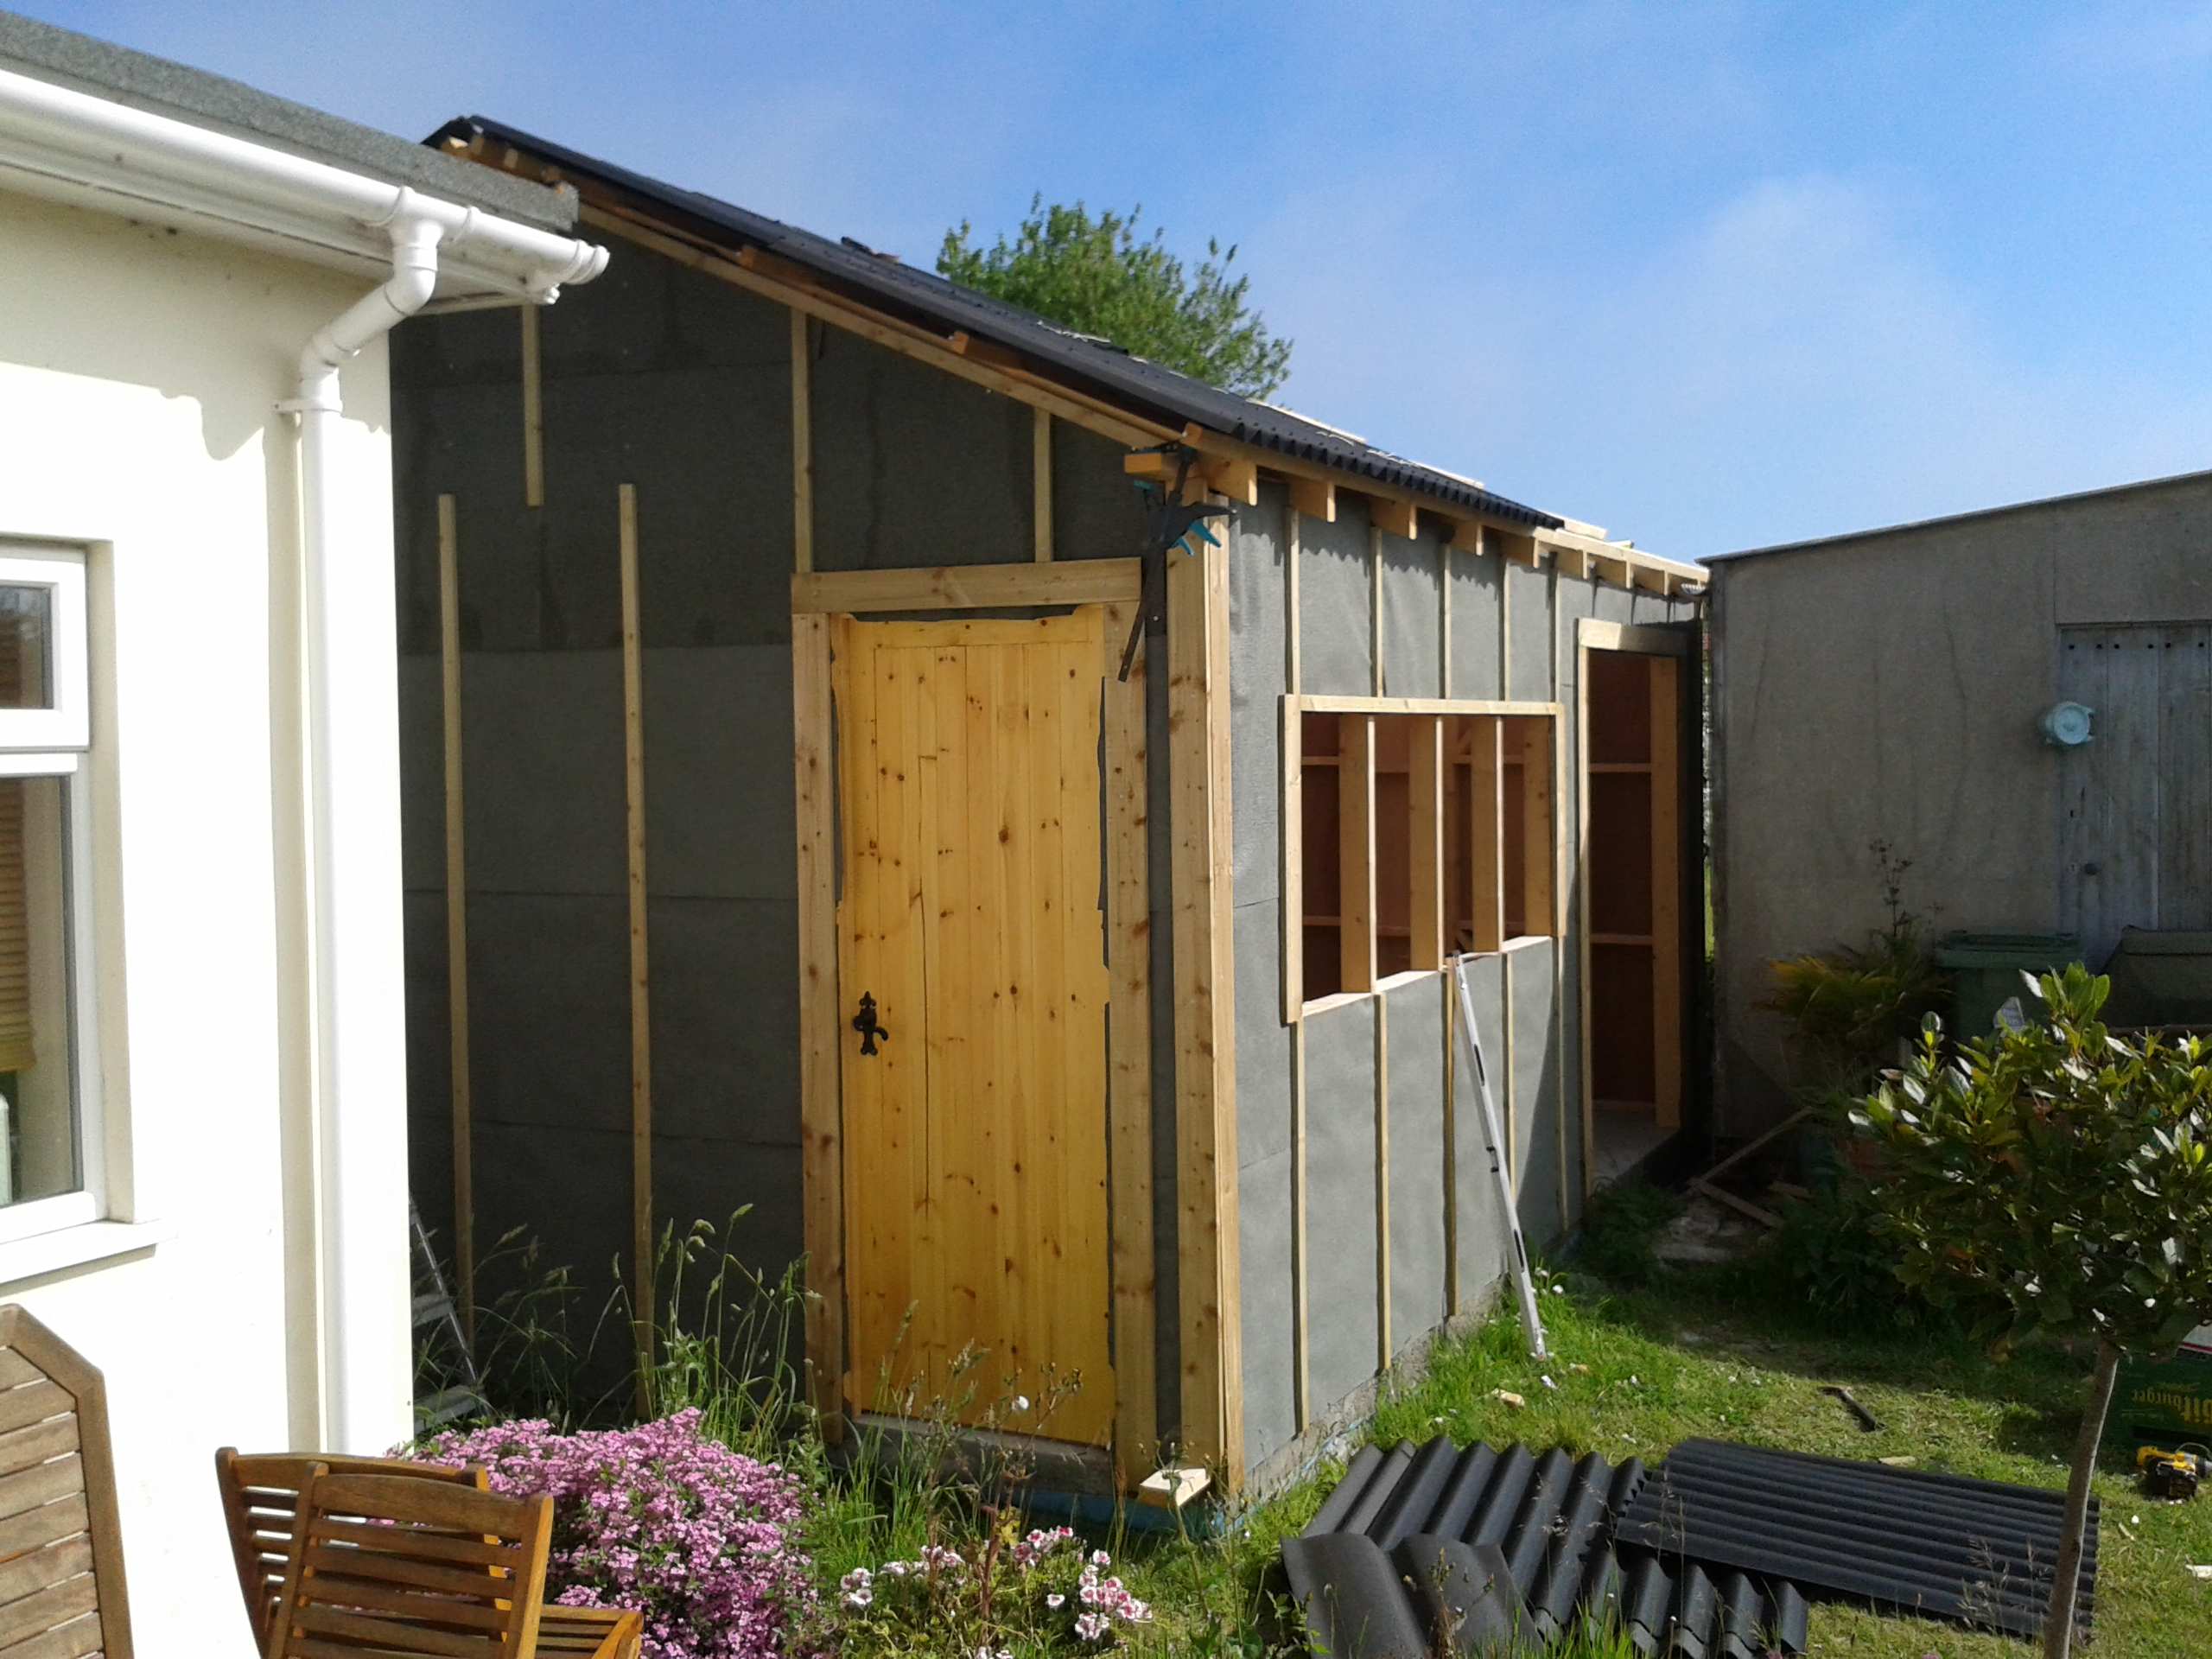
With the 6mm ply skin in place, I covered everything with roofing felt and battened out in readiness for the feather-edge board to be installed later. For the roof, I used Onduline, which is a corrugated bituminous sheet, nailed onto the roofing battens. I had already installed a door, but I just boarded up the windows and double doors so that the shed was wind and watertight and I could move all of my gear across from the old shed.
The next thing to do was to demolish the old shed. As you’ll see in the next post, the phrase “more haste, less speed” was an adage I learned the hard way…

Leave a comment