

Time to cut all the pieces to something approaching their final shape. I was able to use my shop-made turning saw for this job, and it worked a treat. I had to experiment a bit with the tensioning cord but after a few extra turns I was away.
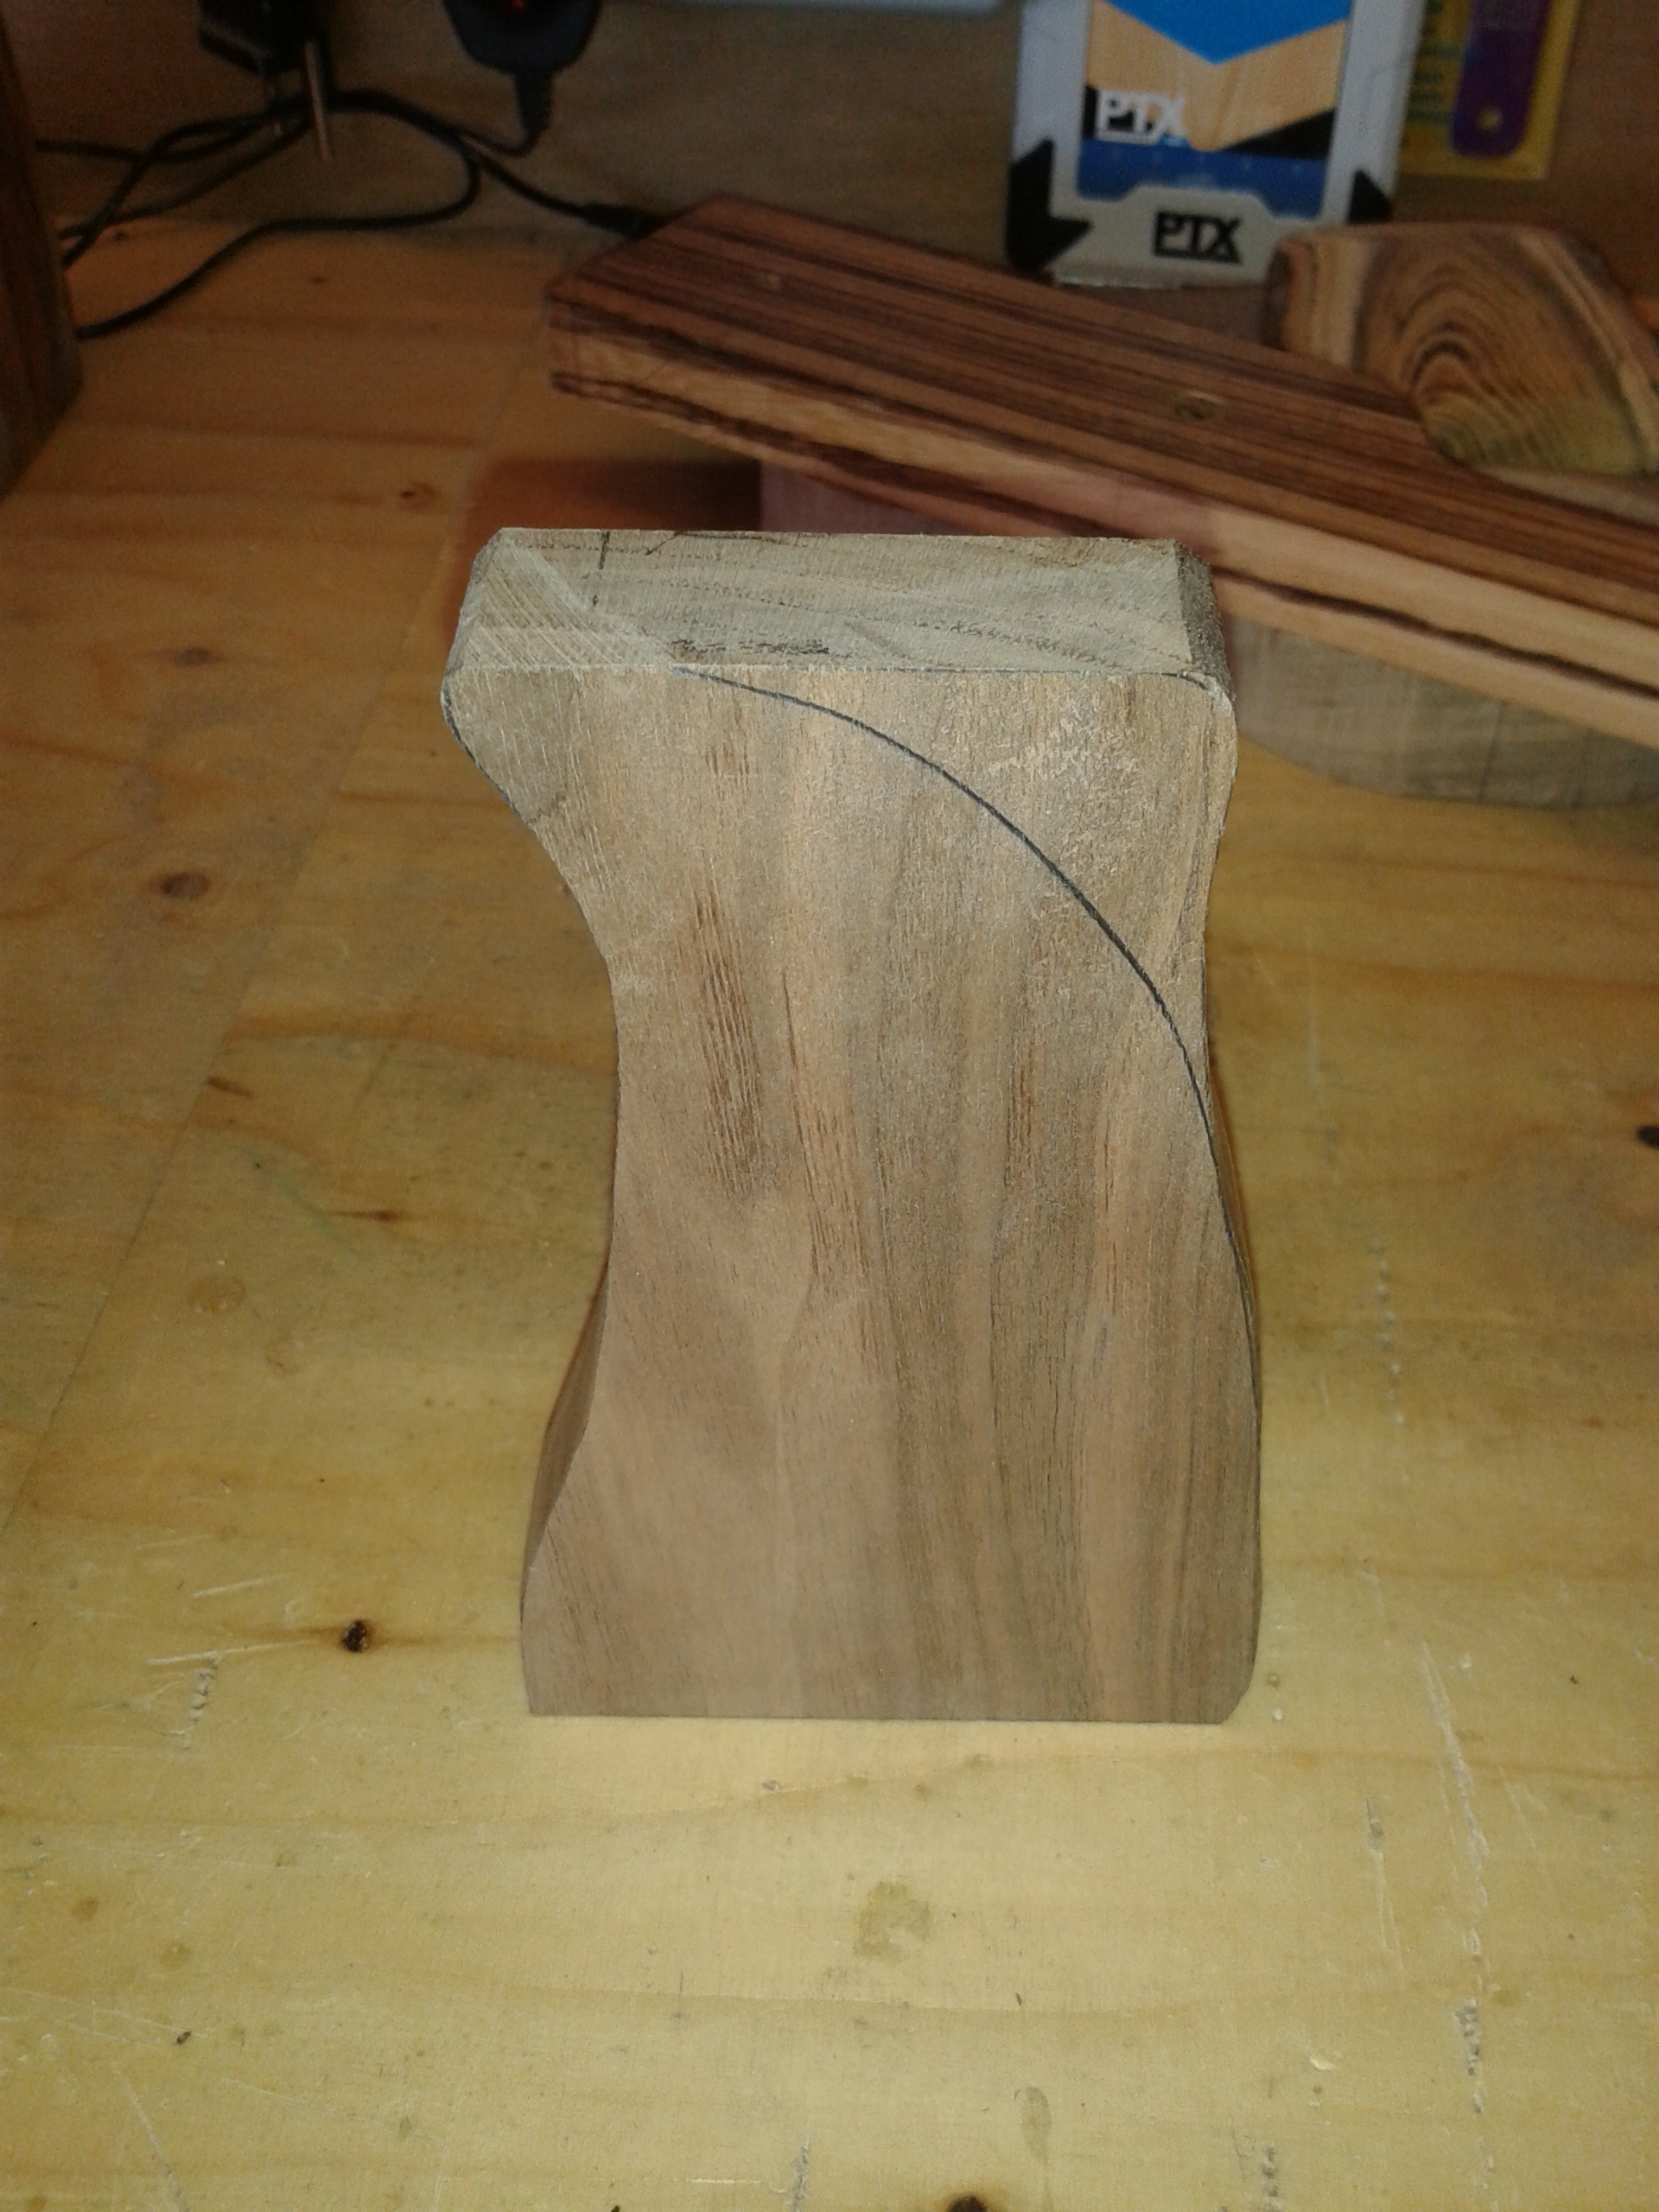
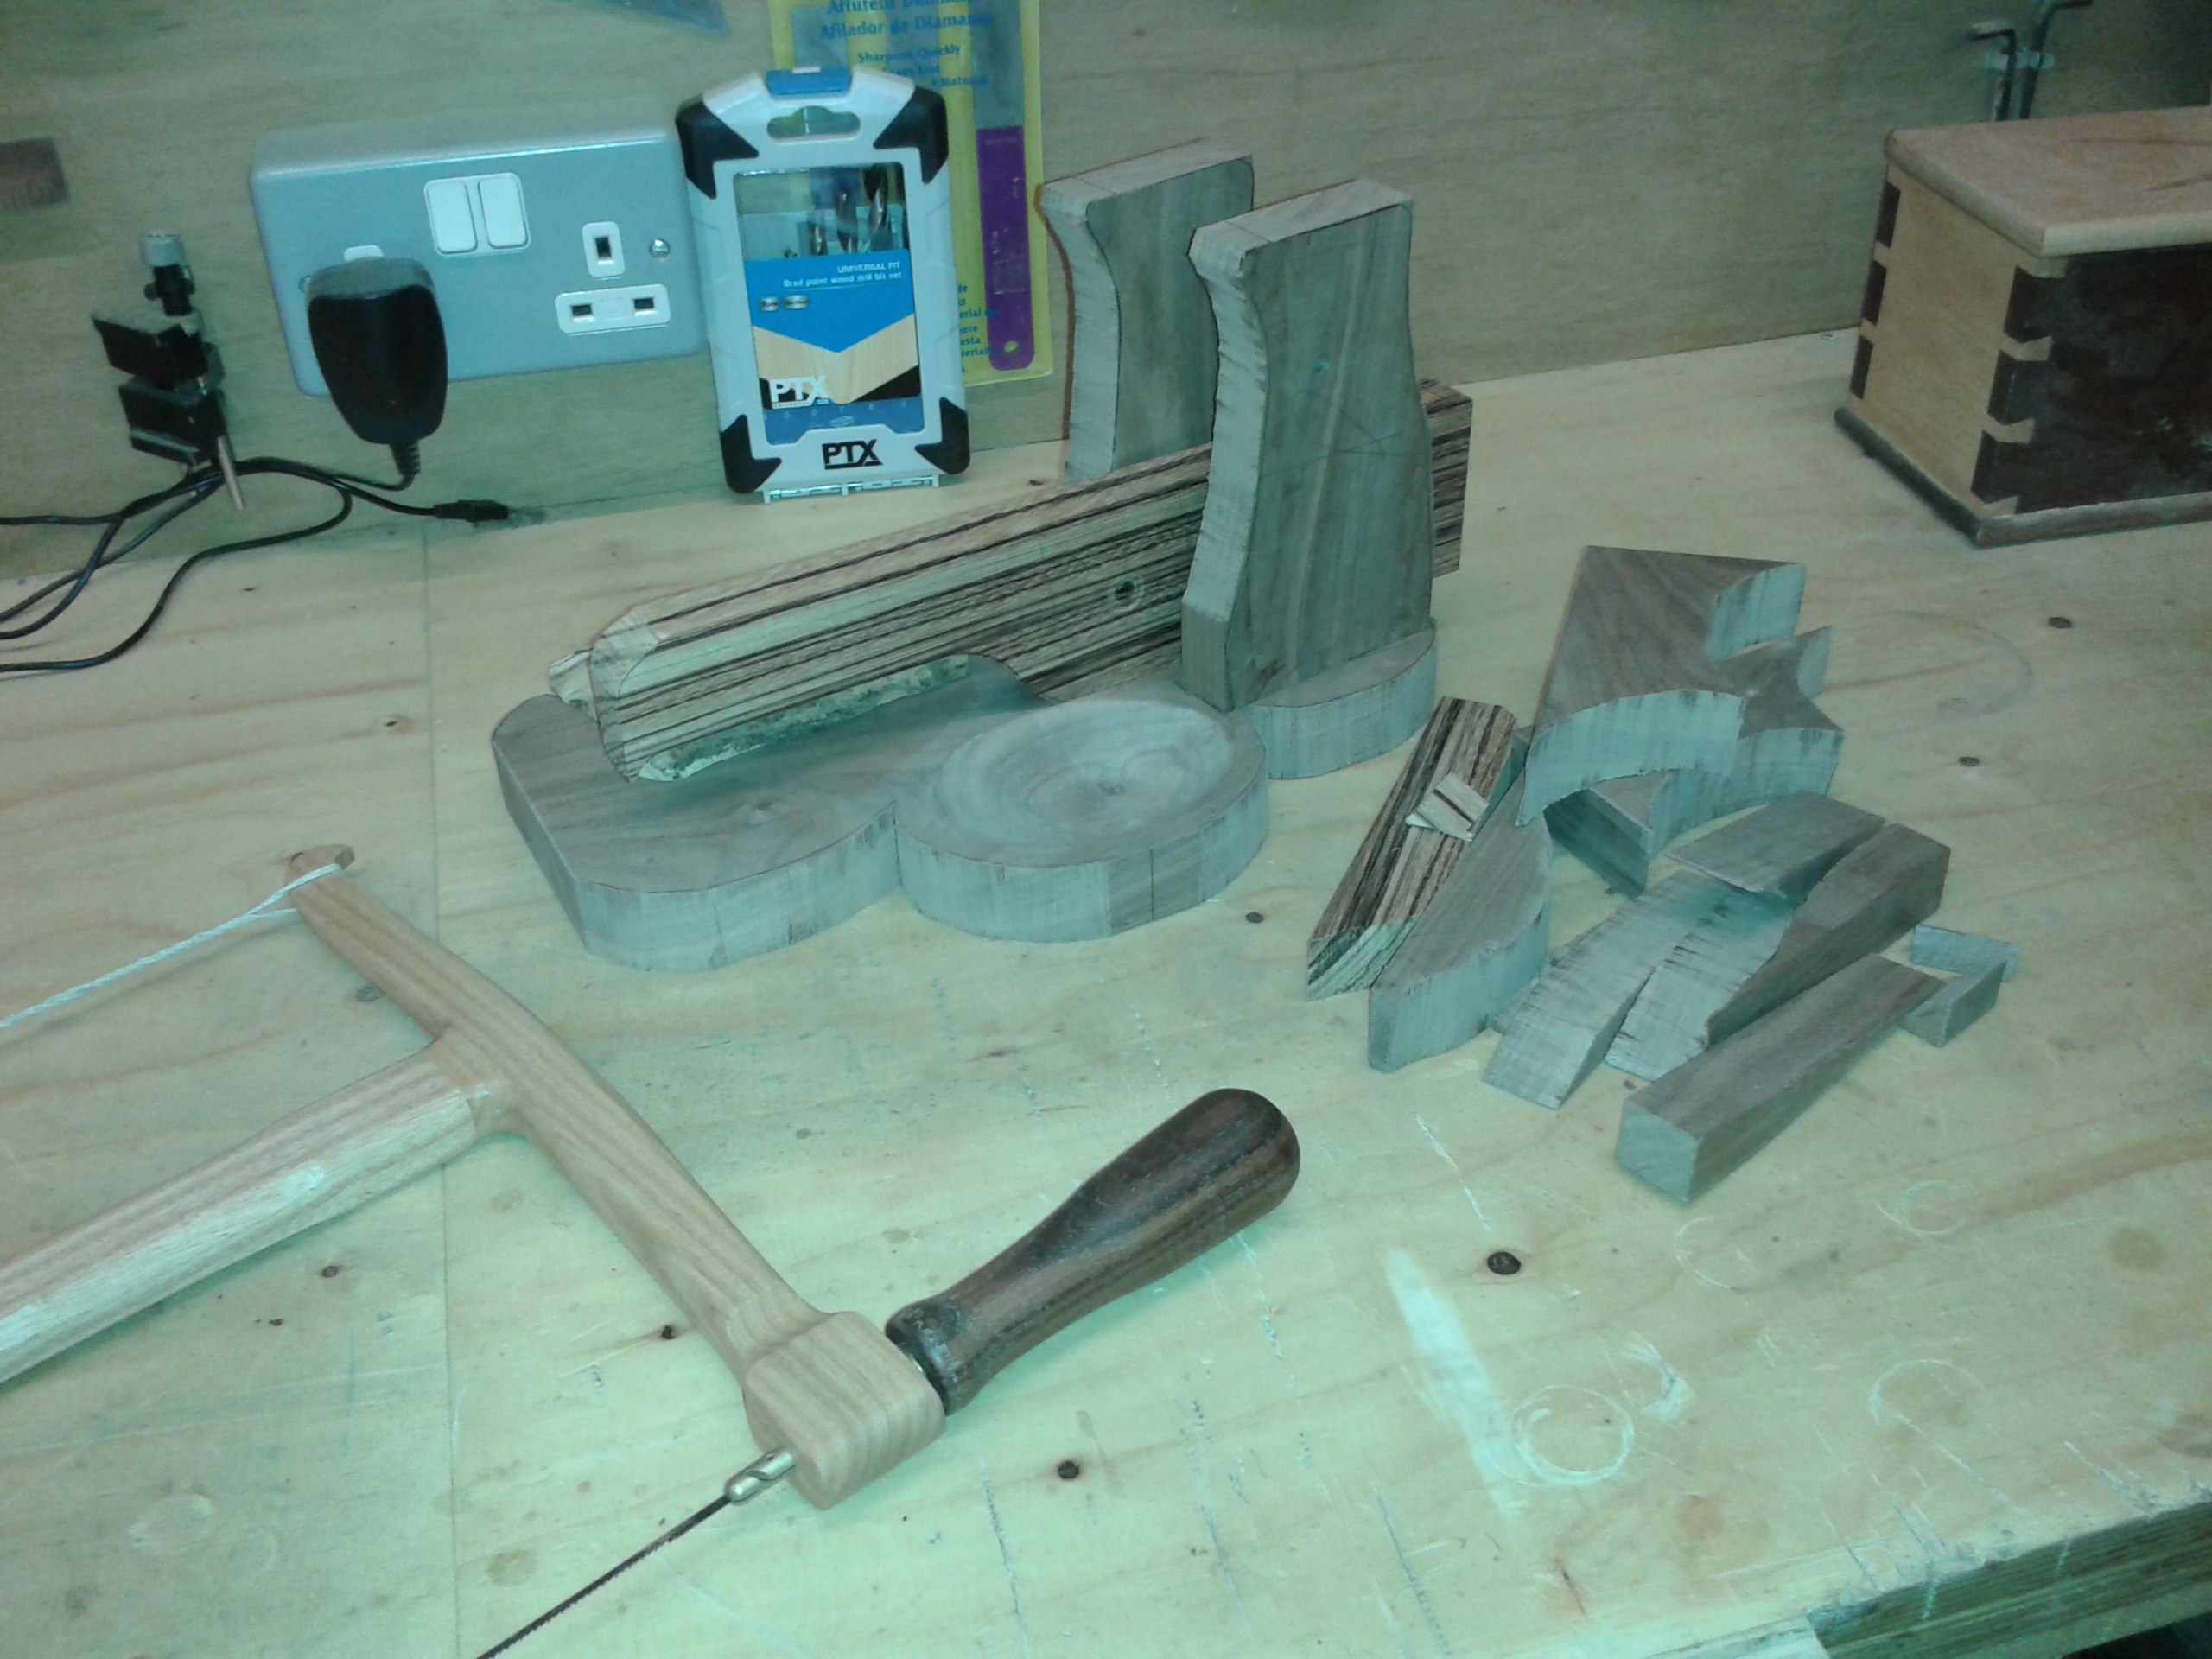 With the parts all cut out, the slicer was beginning to look how I had envisioned it, but there was something not quite right. It took me a little while to put my finger on it, but I eventually decided that it was the uprights – the shape was all wrong – so I made a minor modification on the fly, updating the template as I went. The modification looks a little like Rhino horns, which fits the African roots of this project.
The next job was to refine the parts with a spokeshave, a rasp, a file and eventually the various grits of sandpaper, starting with 120, then 180, 240 and, finally, 320.
 For finish, I settled upon Tung oil. This is because it is non-toxic and so ideal for anything that will come into contact with food. Apparently it is routinely used to finish chopping boards and worktops and such. Some people like to thin the first coat with white spirit to ensure a good penetration, but that seemed to defeat the object of a non-toxic finish. I opted instead to warm the first coat in a double boiler, much like I did when mixing the linseed oil and wax for the Sawyer’s Bench. This certainly decreased the viscosity, but I’m not sure if it had the desired effect. I decided not to apply any wax after the oil. I’m not sure how a wax finish would react to contact with food but in any case, without the wax, the Tung oil can be re-applied if necessary.
 Each coat of oil was wiped on with a cloth and allowed to dry for 30 minutes before wiping off the excess. I left each coat to cure for 24 hours before rubbing down with 0000 steel wool and applying the next coat. As with linseed oil, used rags can spontaneously combust and so I made sure to soak them in water before disposing of them. I left the areas around the dowel joints free from oil so that I could apply extra glue in those places for a belt and braces joint.
 While the oil was drying I turned my attention to the hardware – the brass pin, the saw nut and the blade. The brass pin just needed a light sanding at the ends to provide a key for gluing. The saw nut just needed a buffing with brass polish and it was good to go. The blade however needed quite a bit of work. There was a certain amount of tarnishing to it that had to come off, and it was as blunt as a baby’s ear. Once the metal was up to muster, I was able to fit the blade in the handle.
After the wood had received four coats of oil it was time for assembly. This was something of a fiddle because the I wanted the brass hinge pin to be captive in the uprights, but obviously not in the handle. I settled on epoxy for this, ensuring that the handle did not get stuck anywhere by smearing a little wax in the places where there was a risk that the epoxy would ooze out. Before I could do that though, I had to prepare the dowel joints with wood glue. I had already sized the bottom of the uprights with glue the day before, as end-grain does not glue very well. Once the wood joints were prepared, I applied the epoxy to the brass pin and began the final assembly. I had to work fast because I needed to assemble the whole thing before the epoxy went off.
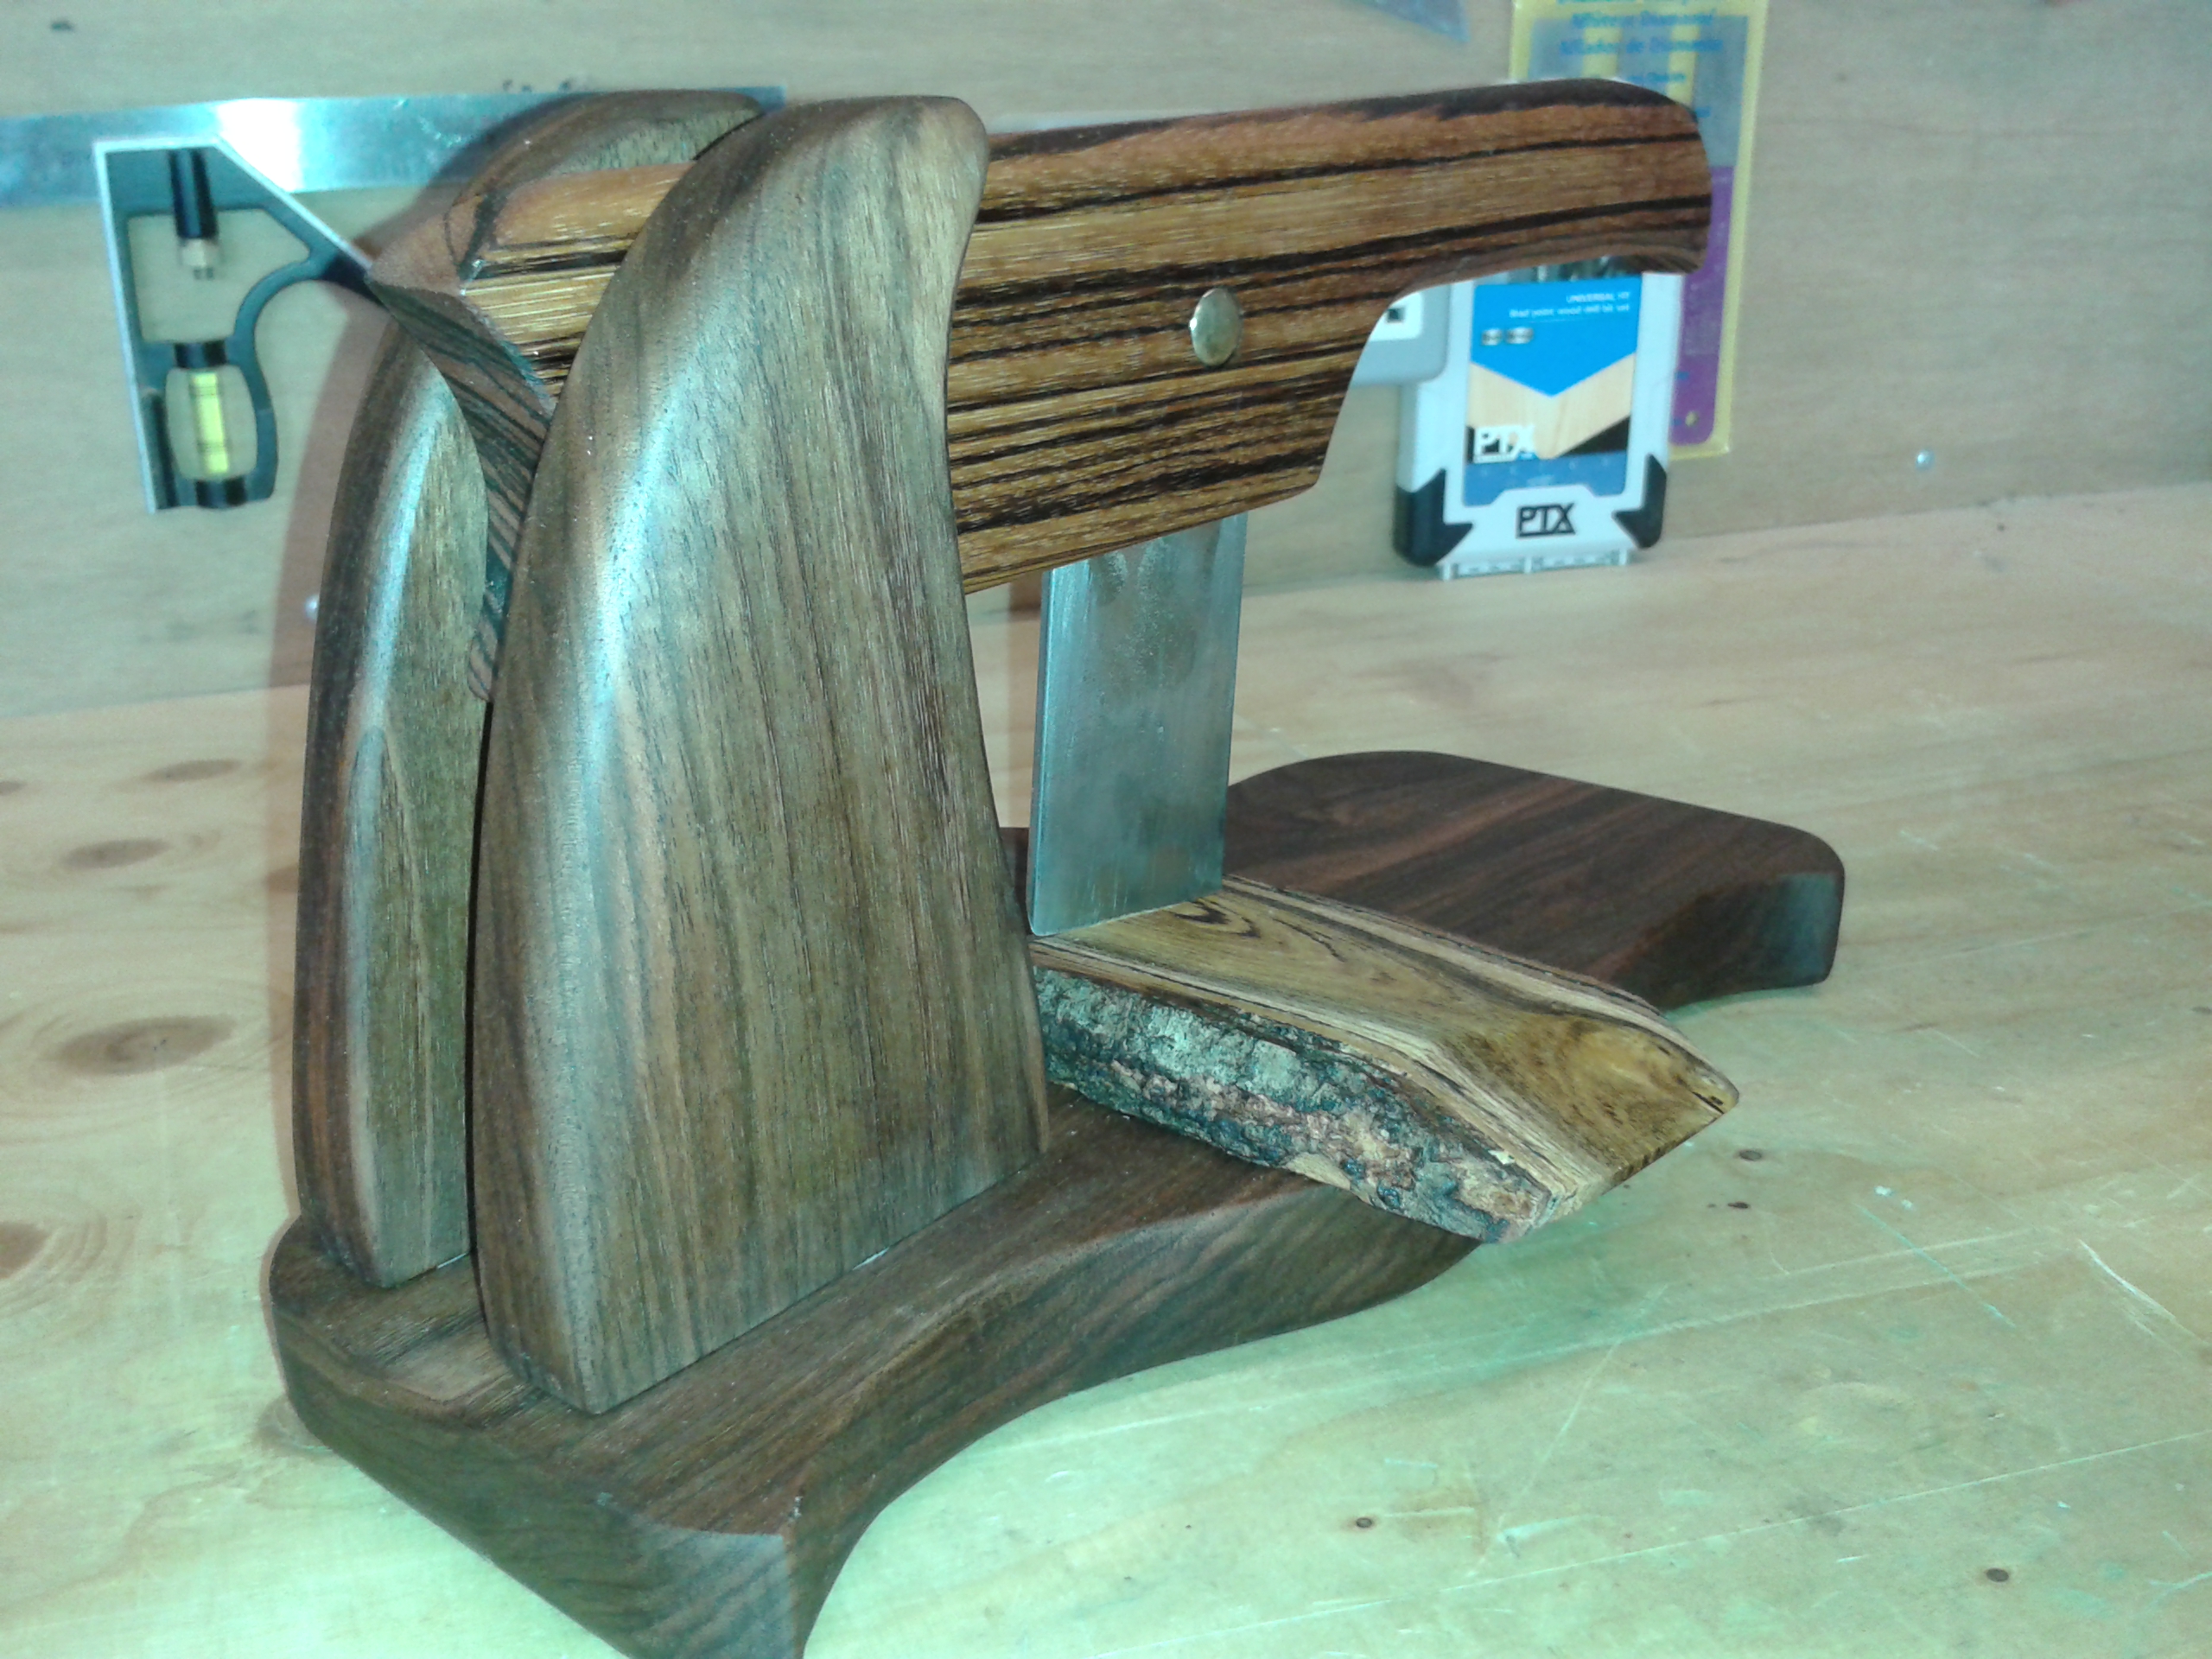
And here we have it. The finished product.


A few felt pads applied to the base and it’s into a box with it, ready for delivery. I’m quite pleased with the result, although I don’t know how well it works as I haven’t got any biltong with which to test it. It will be delivered to my patron some time over the next couple of days and I’ll probably report back with how it was received.


Fingers crossed and watch this space…

Nice one Stu.
P.
LikeLike
what the heck isn a biltong slicer?
LikeLike
Erm, its a device for slicing biltong.
https://goatboyswoodshop.wordpress.com/2015/05/13/mystery-project-revealed/
LikeLike
aw, now you made me look up biltong. sounds good, like our beef jerky. my dog gets turkey jerky as treats.
LikeLike