A few weeks ago I found myself in need of a project that might take my woodworking to the next level. Up until now I have tackled very simple projects while I find my feet in the world of hand tool woodworking. I didn’t want to run before I could walk, but I wanted something that was a little more complicated than the small dovetailed boxes I have been pottering about with recently. Tom Fidgen’s book An Unplugged Life provided an ideal suggestion in the form of The Funeral Chair. As I mentioned in my last post, I am sure that seasoned woodworkers would find this project to be quite simple, but bear in mind that I am a noob.
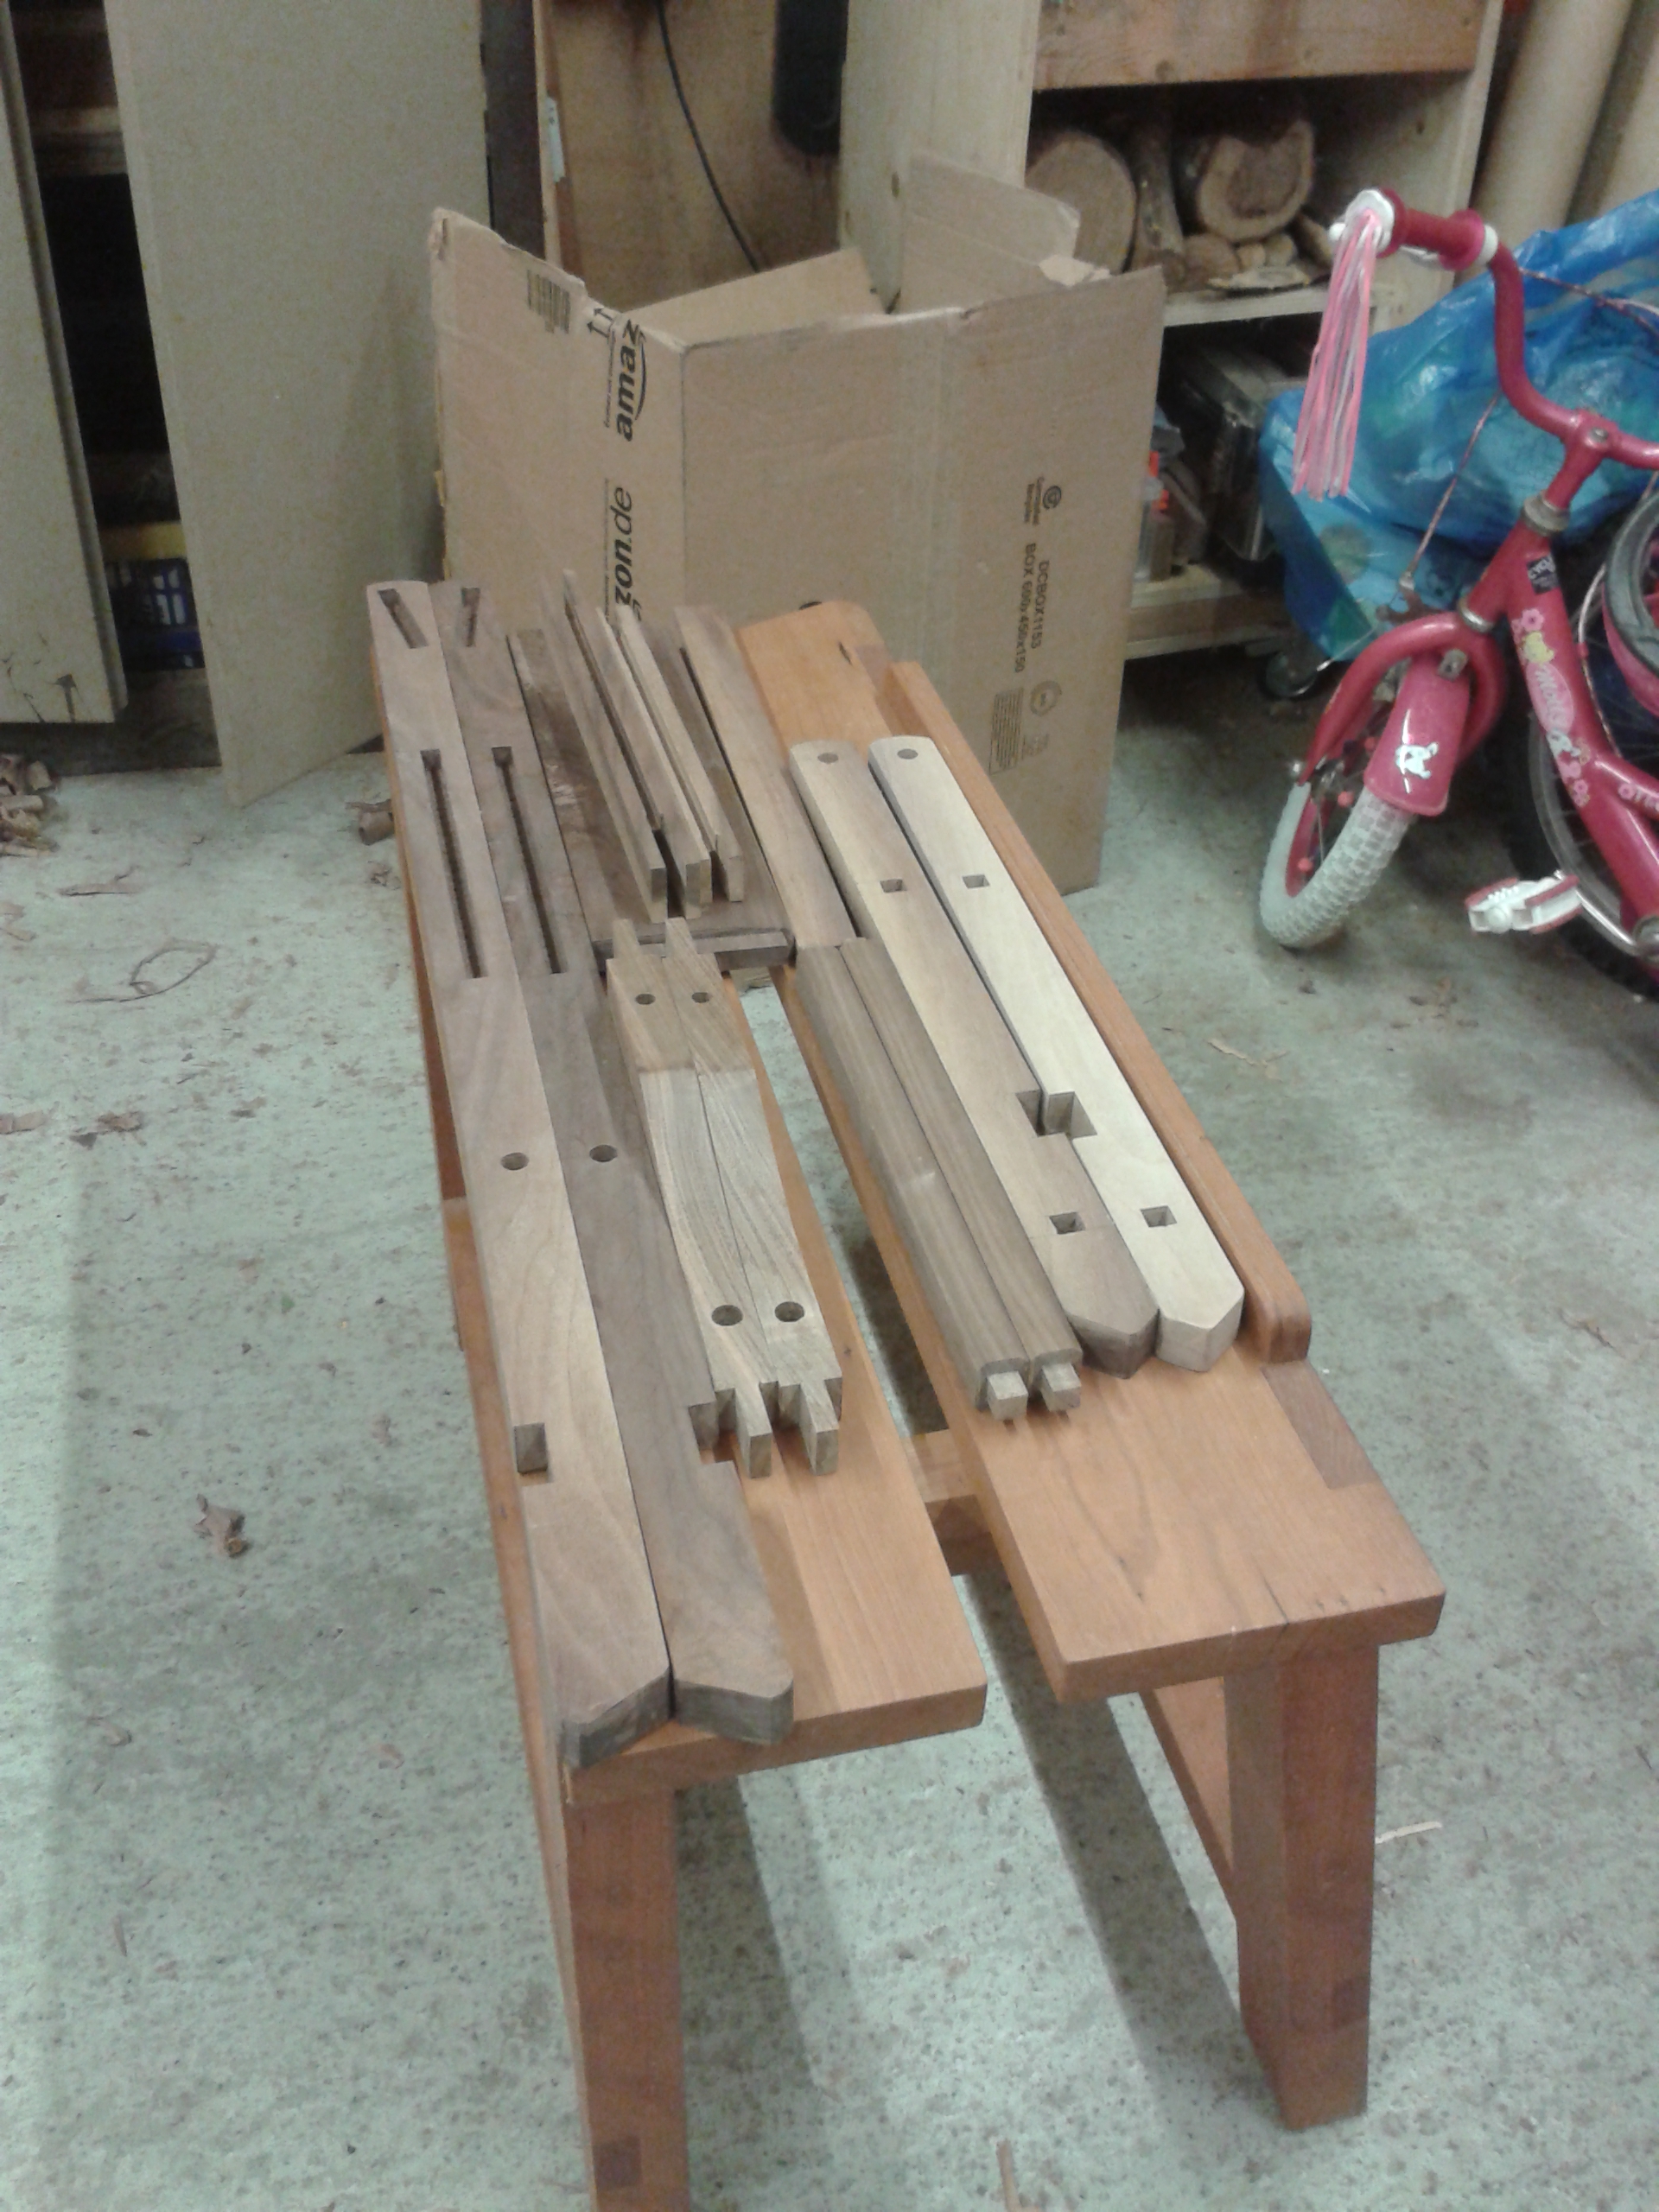
 The Funeral Chair is a small folding chair that could presumably be brought out to seat guests at family gatherings. It could just as well be called a Wedding Chair or Picnic Chair but Funeral Chair is what Mr Fidgen calls it so I’ll go with that as well. It consists of 15 pieces of timber, four pivot hinges and two brass support pins, and it was quite a challenge for little old me, albeit a very enjoyable one. Once again, no power tools were used in the making of this project – the only electricity used was to light the shop.
As with any project I began with timber selection, eventually settling on a gnarly piece of rough sawn walnut for the frame and a plank of ash for the seat slats. Most of the frame consisted of 1″ thick components so I ripped the various parts off on my saw bench, before planing them down to their final dimensions. The only shaping to do was on the side pieces for the seat.
 Next came the joinery. The seat frame consisted of four pieces joined with bridle joints, a joint that I had not attempted before. The front and back pieces also needed a ¼” groove to take tenons on the seat slats. I dug out my Ebay Stanley #50 for the first time and sharpened up the ¼” iron.
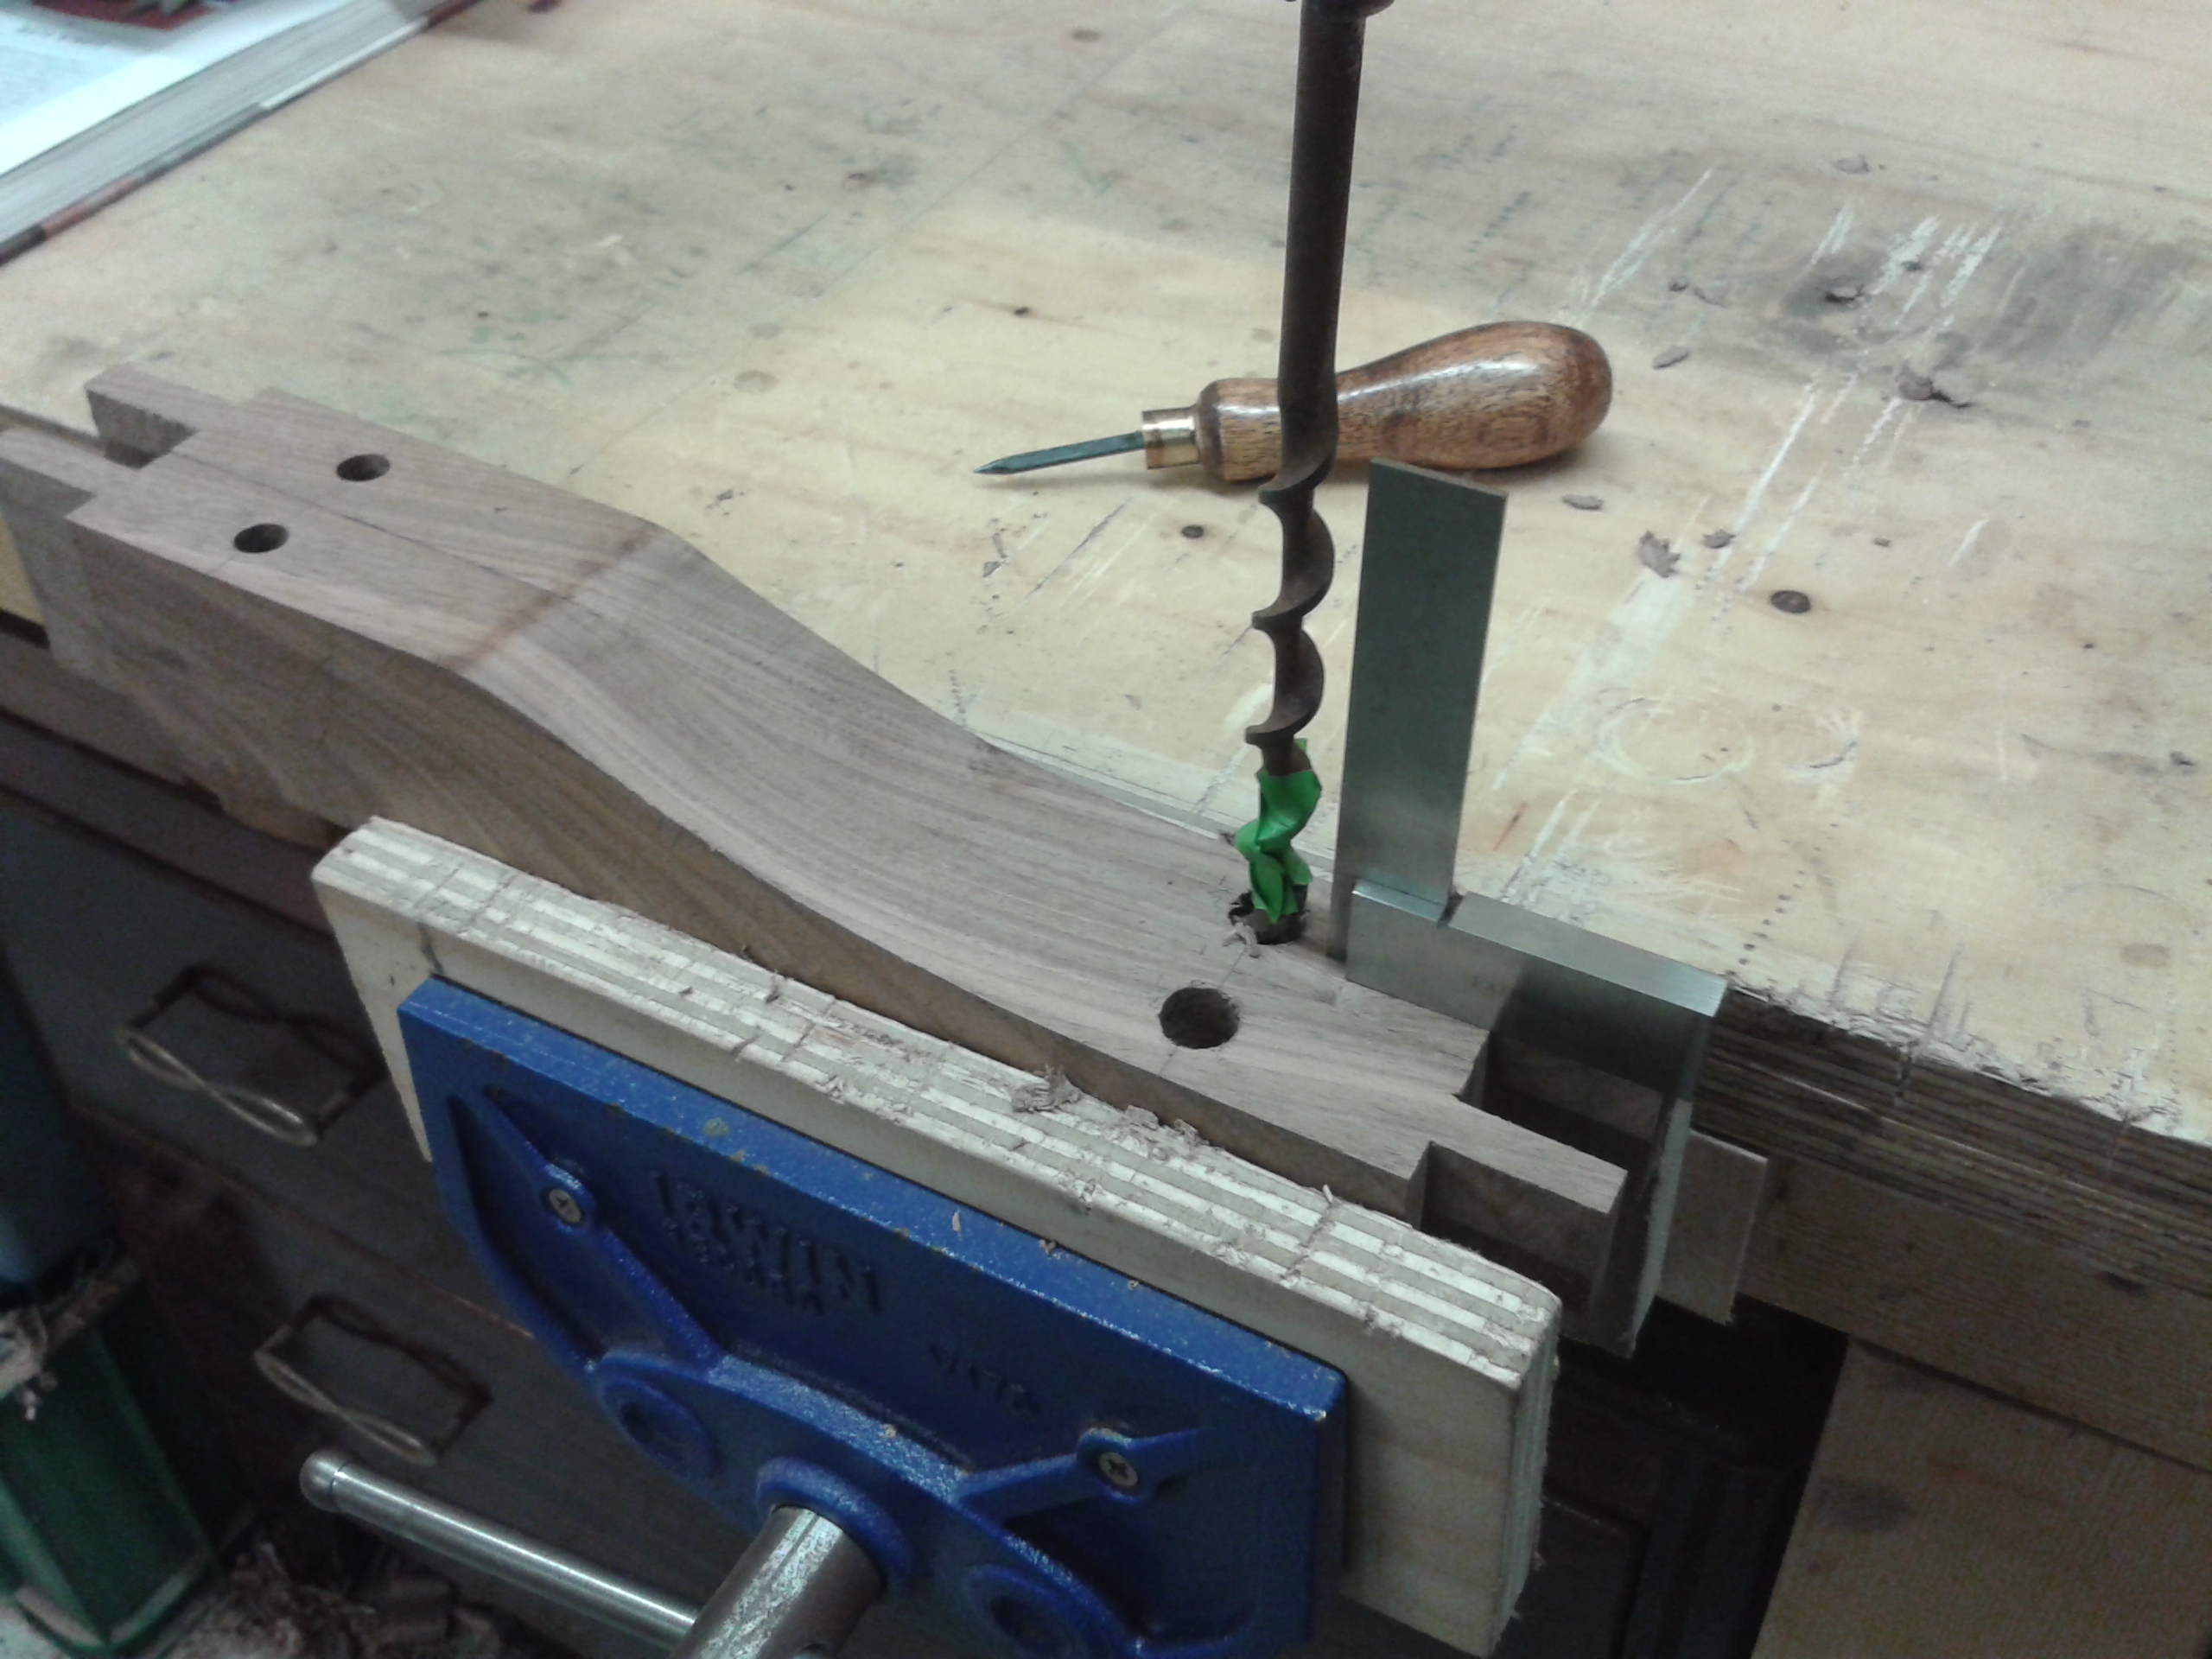
 The side pieces of the seat frame also needed holes drilled for the pivot hinges and the brass support pins. The pivot hinges were a little hard to come by. The plans stipulated something called a Roto Hinge, which is a steel rod inside two pieces of wooden dowel with a washer in between. The wooden parts are glued inside holes on the parts to be hinged. I couldn’t find a UK supplier for these hinges or anything like them so I had to get them from overseas. For the support pins I used a pair of brass bolts with the heads cut off. The plans called for steel but I used brass instead to avoid corrosion.


The joinery for the chair frame came next. This consisted of square mortise and tenons for the stretchers on the front legs, mortise and tenons for the seat back and notches for the back stretcher. There were more holes needed for the hinges as well as grooves for the support pins to slide in.


 With all the components for the frame complete the next step was the seat slats. The plans called for six slats, rebated so that they overlap and support one another, with tenons on each end that fit into the grooves on the seat frame. I went for three slats instead of six, but this was my only major deviation from the plans. Each slat also has a bead detail along one edge. For this, I used the same trick as I did when making the fence for my saw bench: I simply scored a deep line with a marking gauge and refined it with the corner of a cabinet scraper.
Well, this post is getting quite long so I’ll stop here and post later about the finish and glue up. Cheers
gb