
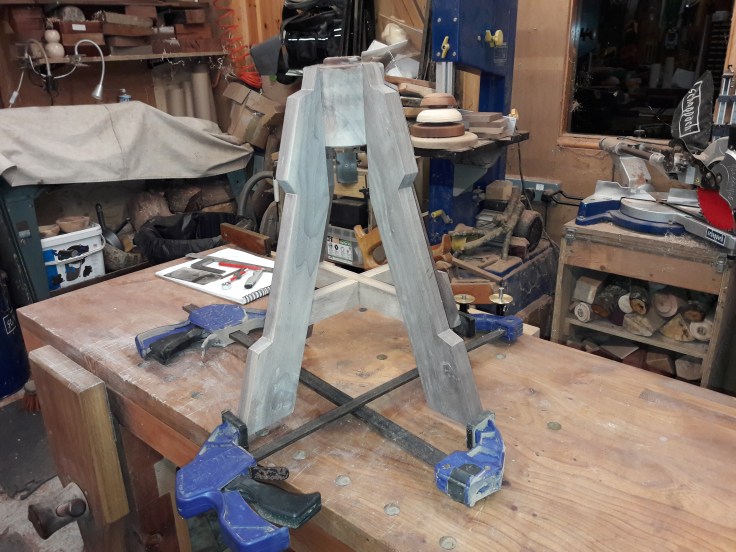
The glue-up for this project was not without its difficulties. I am reminded of a post a made a while back documenting the glue up for my workbench. On that occasion I nearly haemorrhaged blood from my eyes with the struggle to save the project. This wasn’t quite as bad as that, but it was a real struggle to reproduce the results of the dry-fit whilst fighting against the open time of the glue, a struggle that saw me pounding with a mallet; threatening the wood with violence; swearing like a drunken teenager; and cursing the day I ever took up woodworking. I finally collapsed in a heap of regret, embarrassment, relief and joy. “Never let the wood tell you, ‘no’!”
At this stage I decided to make a little addition to the design. Right from the word go I had fixed ideas about the height that the chair should be when fully extended. The cross-members posed a slight problem however. If I was going to put them at the height I wanted, then the screw could hit them when the seat was fully lowered. Several possibilities presented themselves:
1. I could change the length of the screw – I rejected this idea as it would change the overall height of the stool
2. I could change the height of the cross-members – I rejected this idea because I though it would look a bit goofy.
3. I could change the dimensions of the upper hub so that it would hit the frame before the screw hit the cross-members. I decided to go with this idea and, as you have seen, I built the frame with the cross-members in their original position.
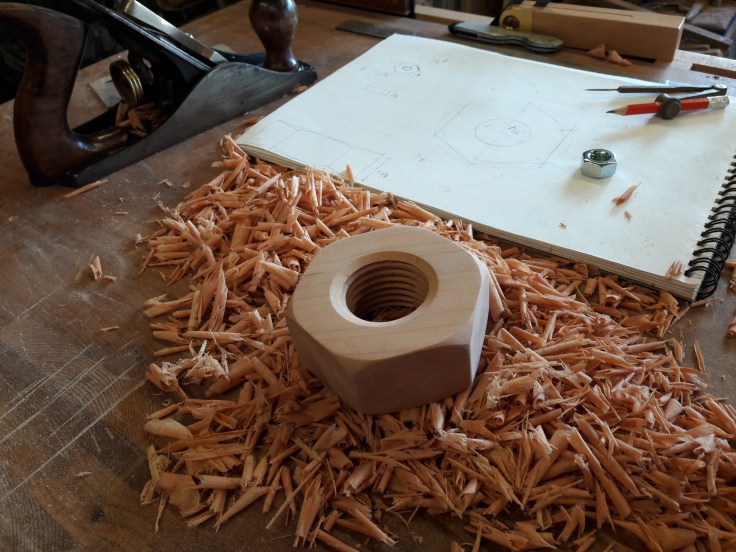
After the glue-up however, I had a brainwave. Why not, instead of enlarging the hub, make a floating spacer that would effectively achieve the same thing, but could also be used to lock the seat into any height position? I found a steel nut, scaled up the dimensions and made one from cherry to match the screw.
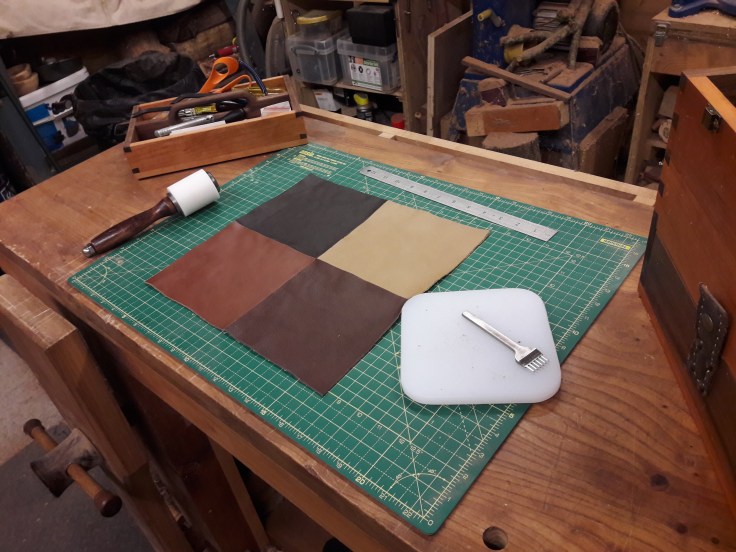
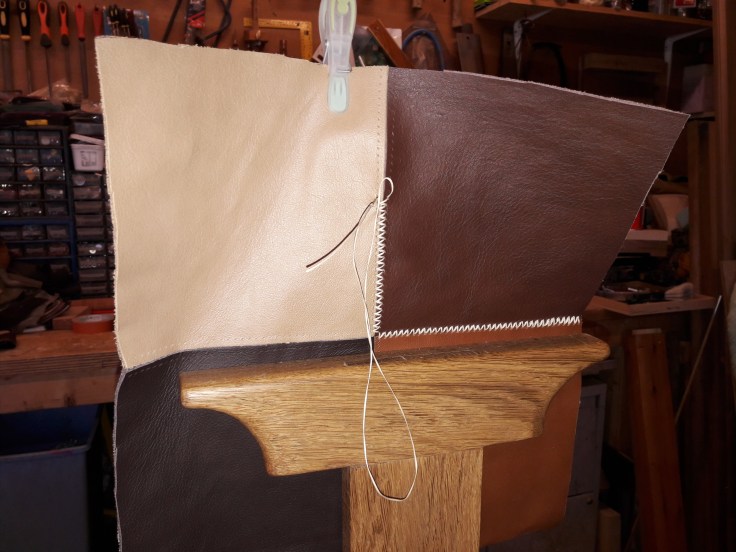
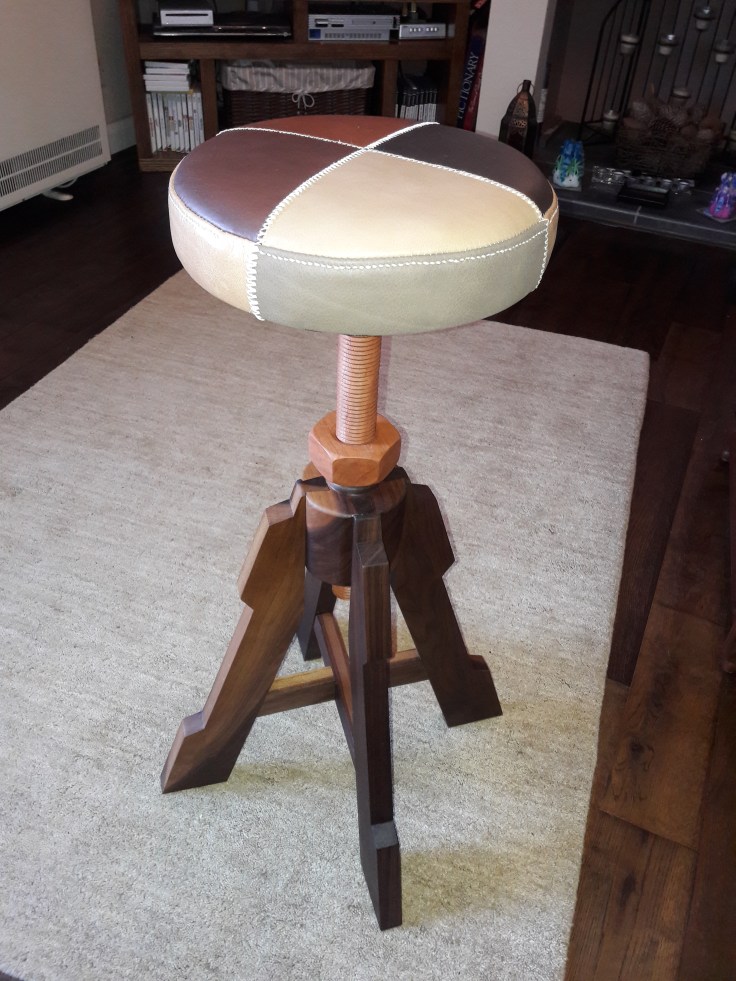
Then it was time for the seat. I found some pieces of scrap leather and stuck them down onto a thin piece of fabric. Then using a pricking iron I punch out holes on either side of each join and hand stitched them with a zig-zag stitch.
I cut out the leather into a circle and added a border, before cutting out some foam.

The seat hub was screwed onto the ply base I cut out last time, with some base cloth in between.

Then it was simply a case of stapling the leather around the foam and onto the ply, and finally stapling the base cloth down.
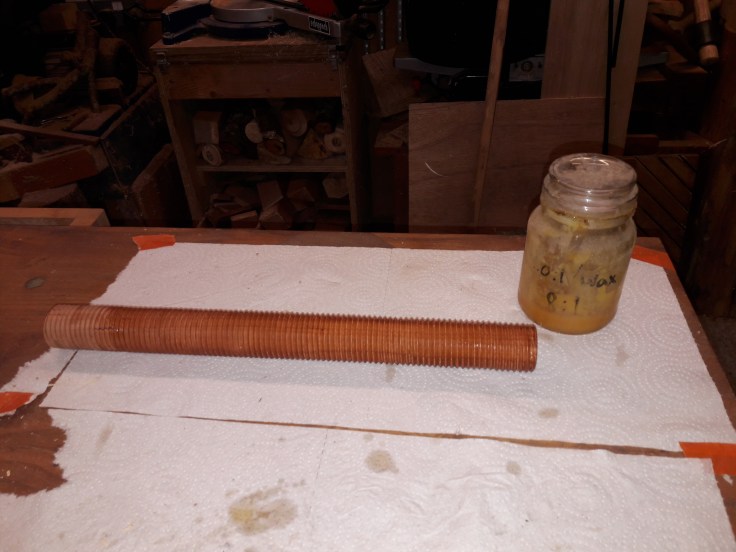
And here it is finished. The frame was finished with 3 coats of my varnish/oil/turps blend and the screw was finished with a coat of my wax/oil mix.
Bloody relieved to have this one finished. I’ve definitely learned a lot and I’d like to make another one sometime. I might leave it a little while though.

If anyone is interested, here are Tom Fidgen’s original videos, where I gleaned the design from.

That looks really nice.
LikeLiked by 1 person
Great job with the ‘architect chair’ and i also liked the blog post series. Good to see you write again!
Cheers
LikeLiked by 1 person