
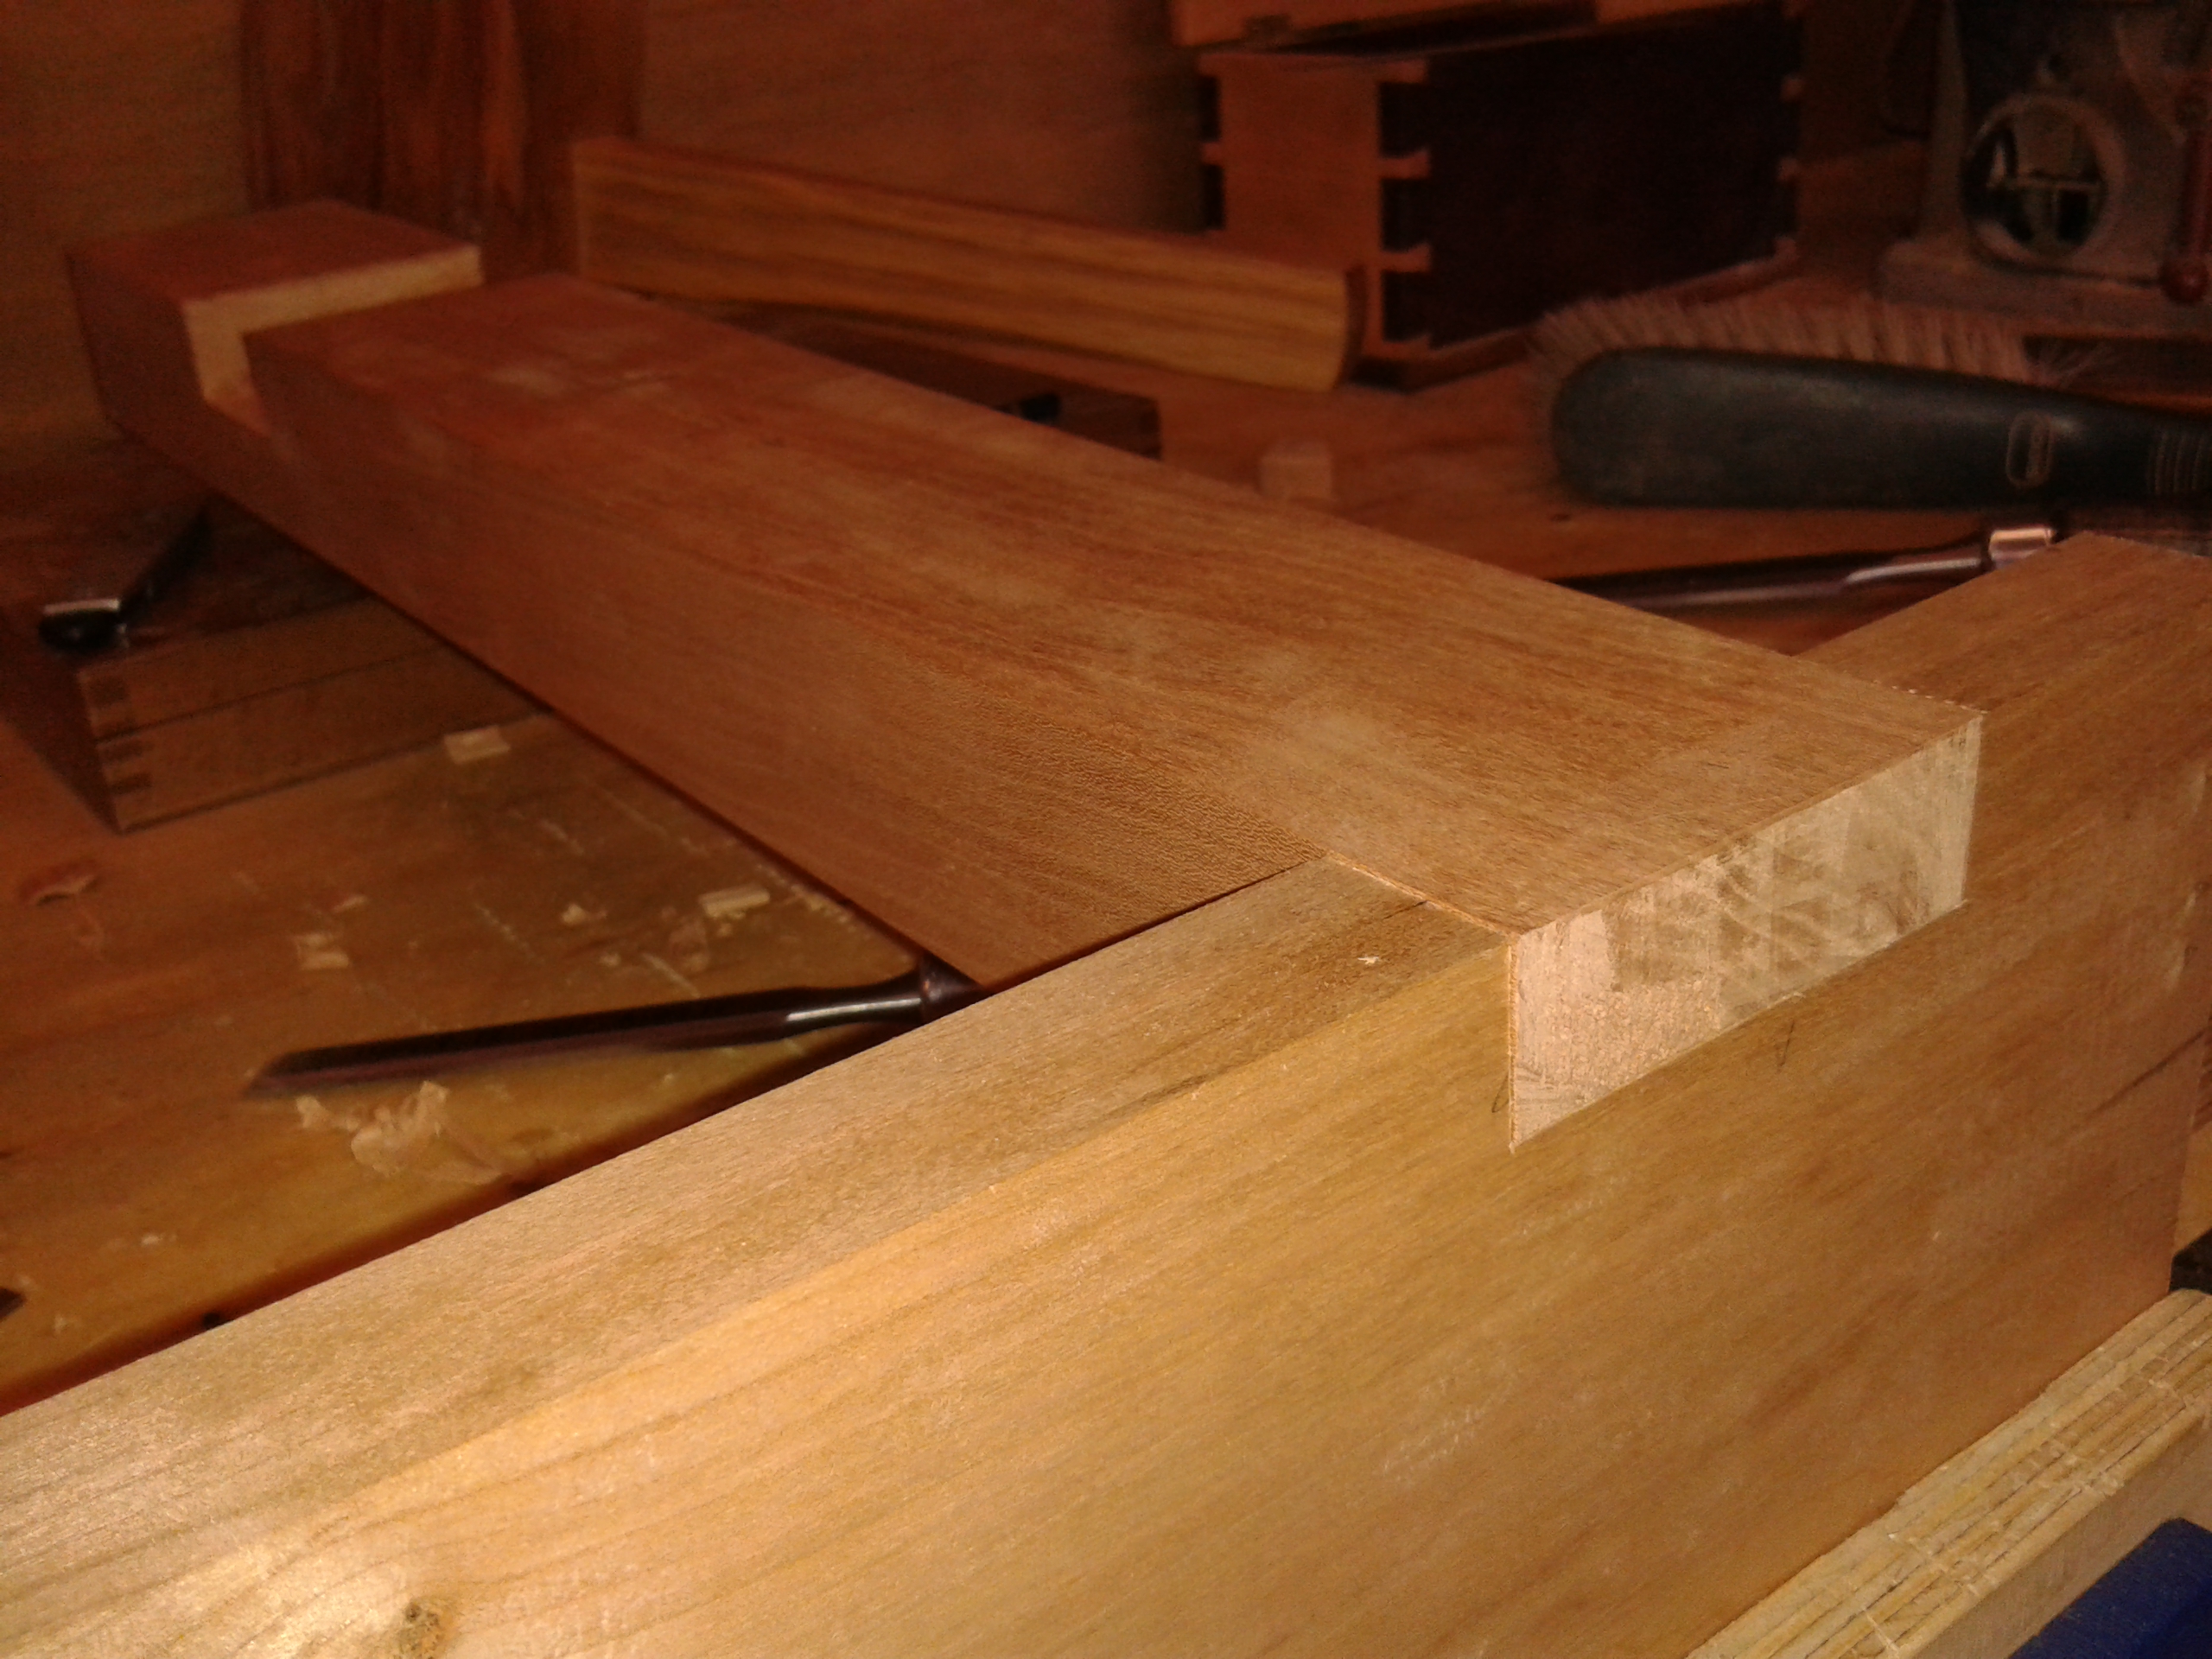
I completed the joinery on my Sawyer’s Bench today, by tackling the half-laps that join the legs to the top boards.
I began with the 90° legs. Using the boards as a reference I scribed a line for the depth, and used a marking gauge to mark the width – which is half the width of the leg in this case. I cross-cut the depth line and chopped the bulk of the waste out with a chisel. I stayed about 1/8″ away from my line at first, and then pared the rest of the waste away.


I did a similar thing with the 100° legs except, instead of chopping the waste, I ripped it with a backsaw. This was because the angle of the cut meant that the grain was also angled down into my line. Chopping the waste with a chisel would have risked splitting in wrong direction.


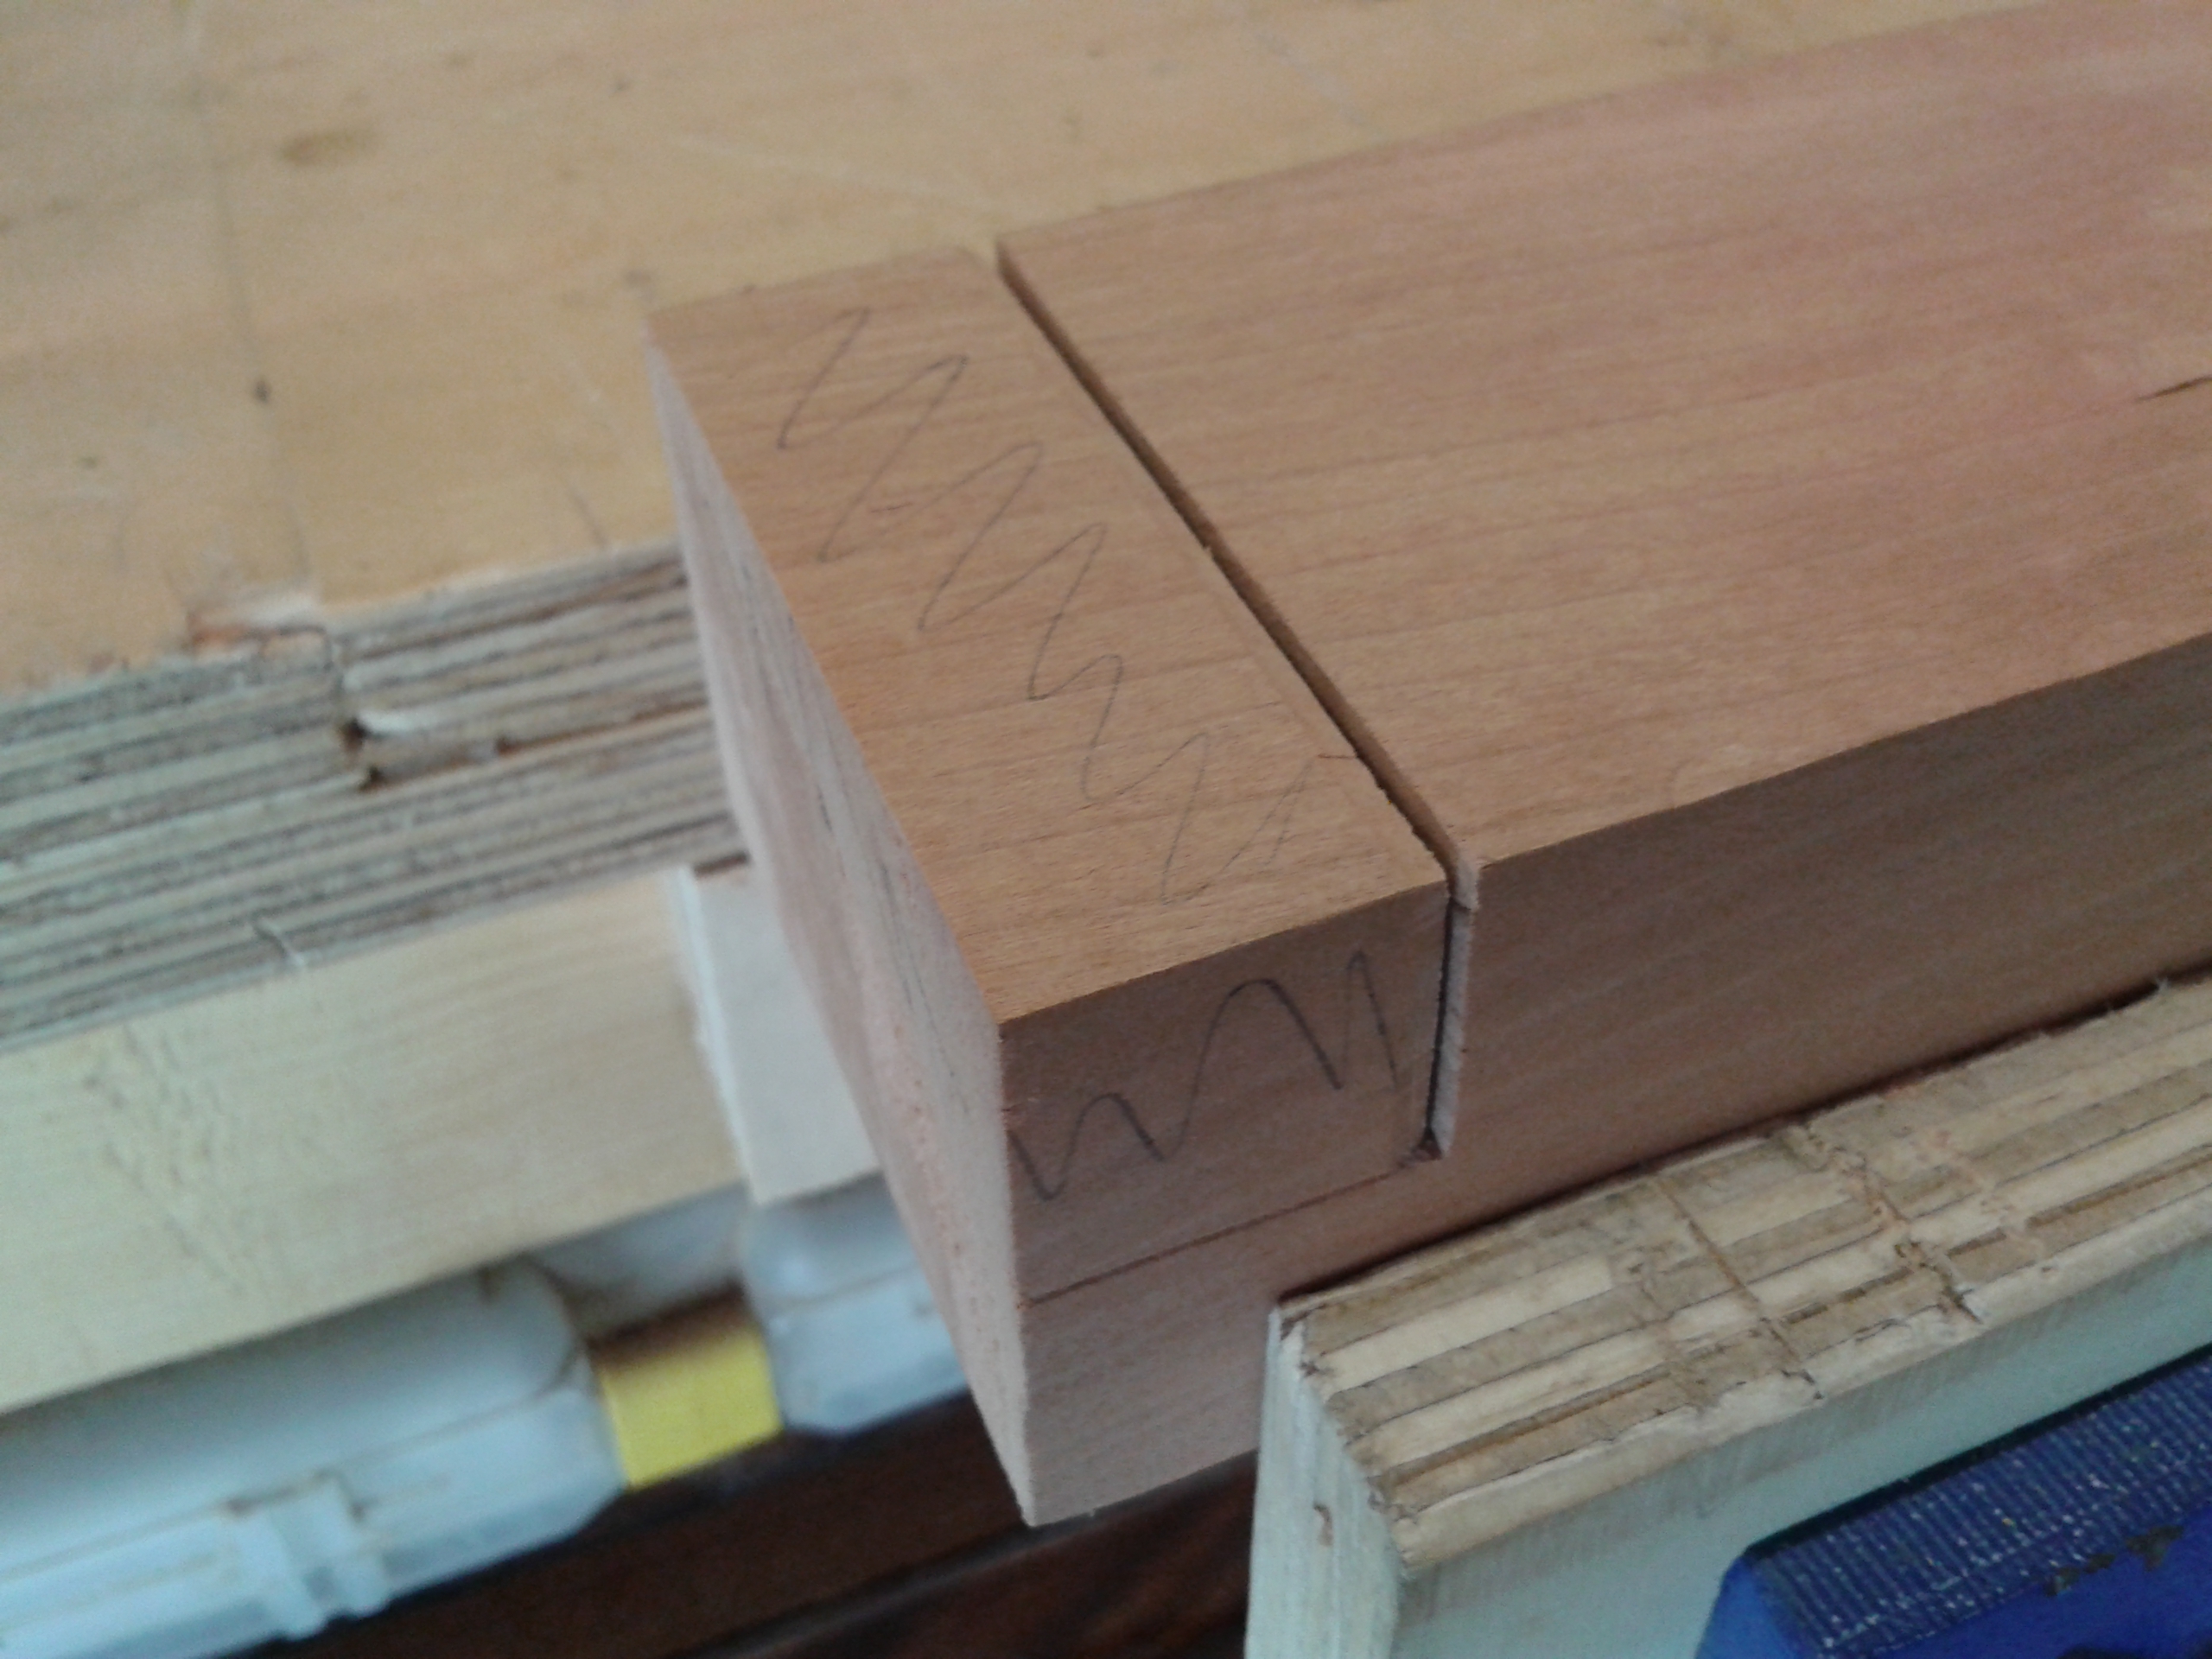
With the legs all cut and the joinery checked for square, I moved to the boards. Here I established the location of the notches – about 2¾” from each end – and used the legs to mark them out, scribing the width with a knife and the depth with a marking gauge. As usual, I established knife walls to guide my saw cuts and, as with the leg/stretcher half-laps, I made a few extra cuts to help with the chisel work later.


On the whole, I’m not 100% happy with these joints. One of them is a little looser than the rest, but not so much as to cause any problems I hope. Perhaps ‘loose’ is the wrong word to use. It doesn’t look loose, it just slips into place a little easier than the rest – it’s not quite as snug.
Being a novice, I don’t really know for sure how much of a problem this will be. I have decided to risk proceeding regardless. After all, all the joints are going to be pegged as well as glued, and even in the worst case scenario of the joint failing after glue up, I will at least have learned something.
Anyway, with the joinery completed, I need to break the arrises with a block plane and make another dry fit. All being well the next step will be to cut the angles in the top boards for the bird’s mouth.

Hi!
A quick one about that irwin vice V175B.
Is that the old or the new ones?
And do you recomend it?
I’m thinking on buying one of these, because is cheaper then importing one old one from UK.
And those in Fine-tools are €€€€
Thanks
LikeLike
Hi
I bought that vice new a few years ago. I would recommend it inasmuch as it does the job and is relatively inexpensive. However, it has its limitations – it is not very big, there is only one screw so it can be prone to racking, and it is not quick release.
One of these fine days I will build a proper workbench, with a leg vice and an end vice, and this one will probably only be used to hold my sharpening station, or if my nipper wants to do some woodwork at the same time as I am working.
GB
LikeLike
Thanks!
LikeLike