
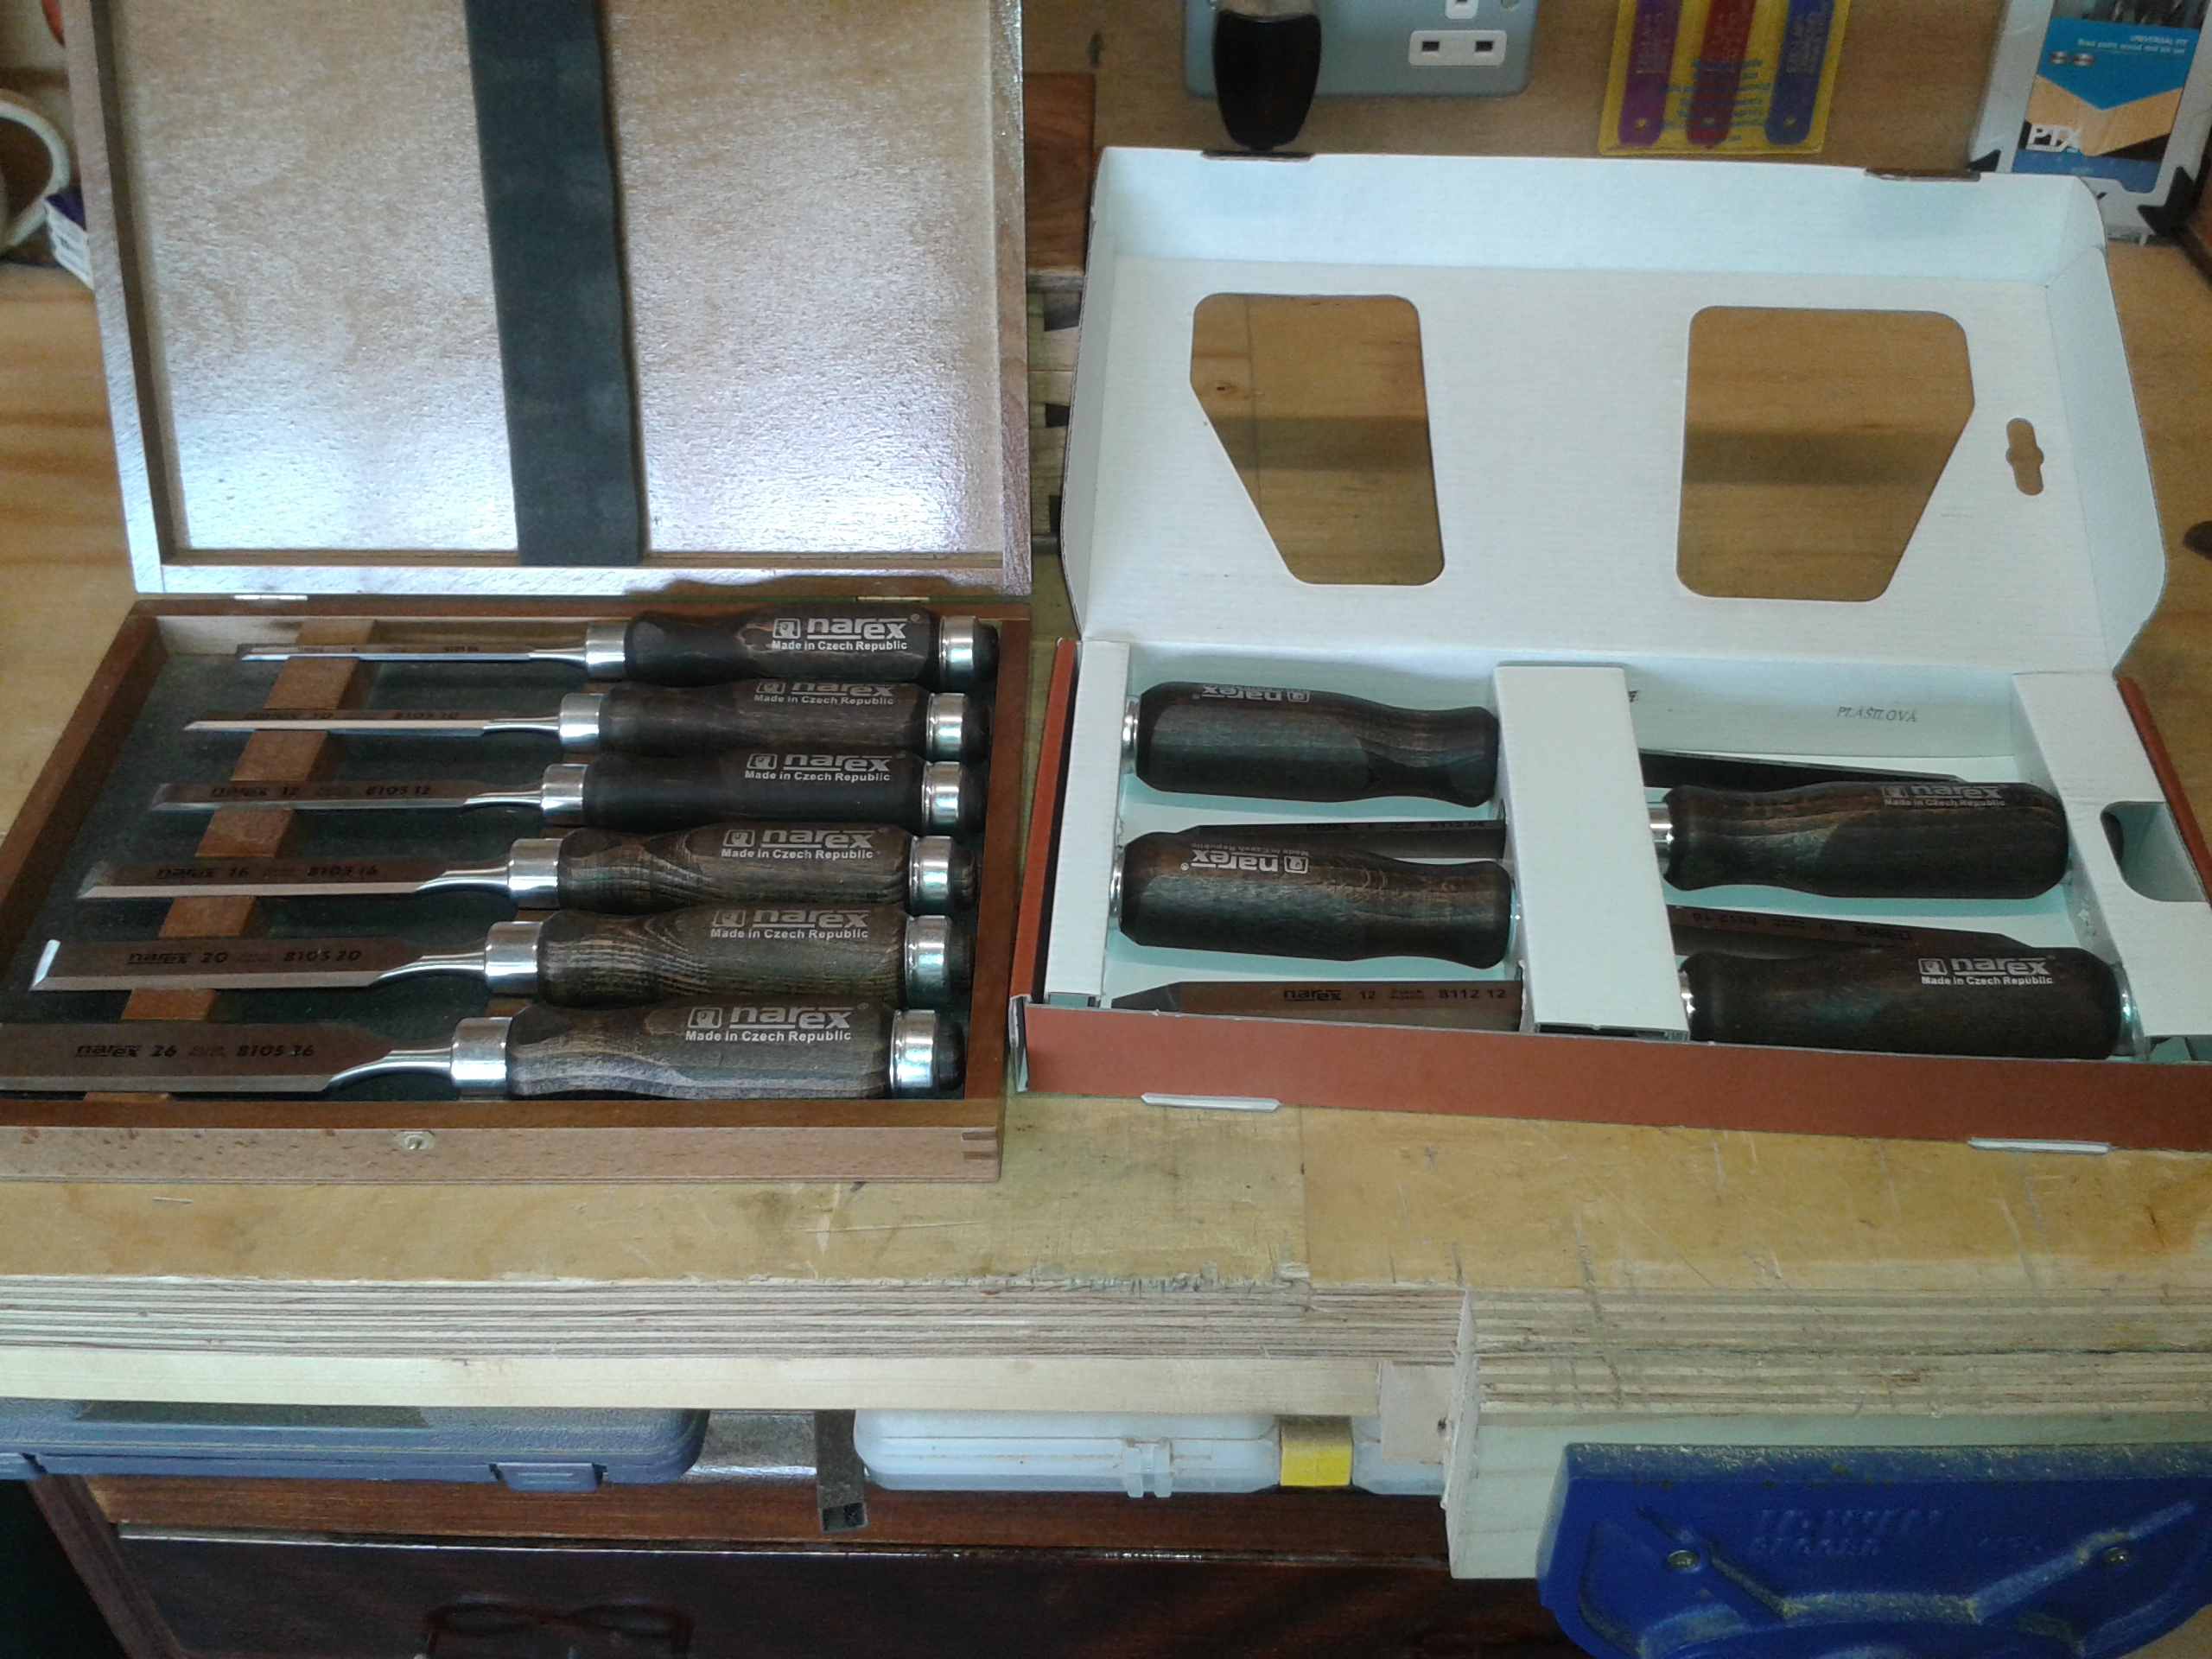
Last year, for dad’s day, my kids very kindly got me a set of Narex bench chisels. Now, I know that they are not high-end chisels, and many a woodworker would probably scoff at them because they aren’t Lie-Nielson or Ashley Isles and didn’t cost the equivalent of the GNP of Ecuador, but for my needs they are perfect. They fit my hands well, they are nicely balanced and they hold an edge well. Also, as a bonus, they came in a nice little box which protects them from surface rust.
 This year, when my kids asked me what I wanted for dad’s day, I had no hesitation in pointing them in the direction of a nice little set of mortise chisels, also from Narex. It is true that I haven’t really missed not having any up until now and I know that some woodworkers don’t bother with mortise chisels – they maintain that a good bench chisel is just as good for chopping out a mortise hole. However, efficiently cutting a good mortise joint is something that I will want to do more of in the future, and bench chisels seem a bit too flimsy to me – I’d hate to snap one.

Anyway, all this throat clearing brings me to the topic of this post, because when they arrived, my nice new mortise chisels were naked! They had no box to sleep in. This will never do thought I, and so this last week I set about remedying the situation.

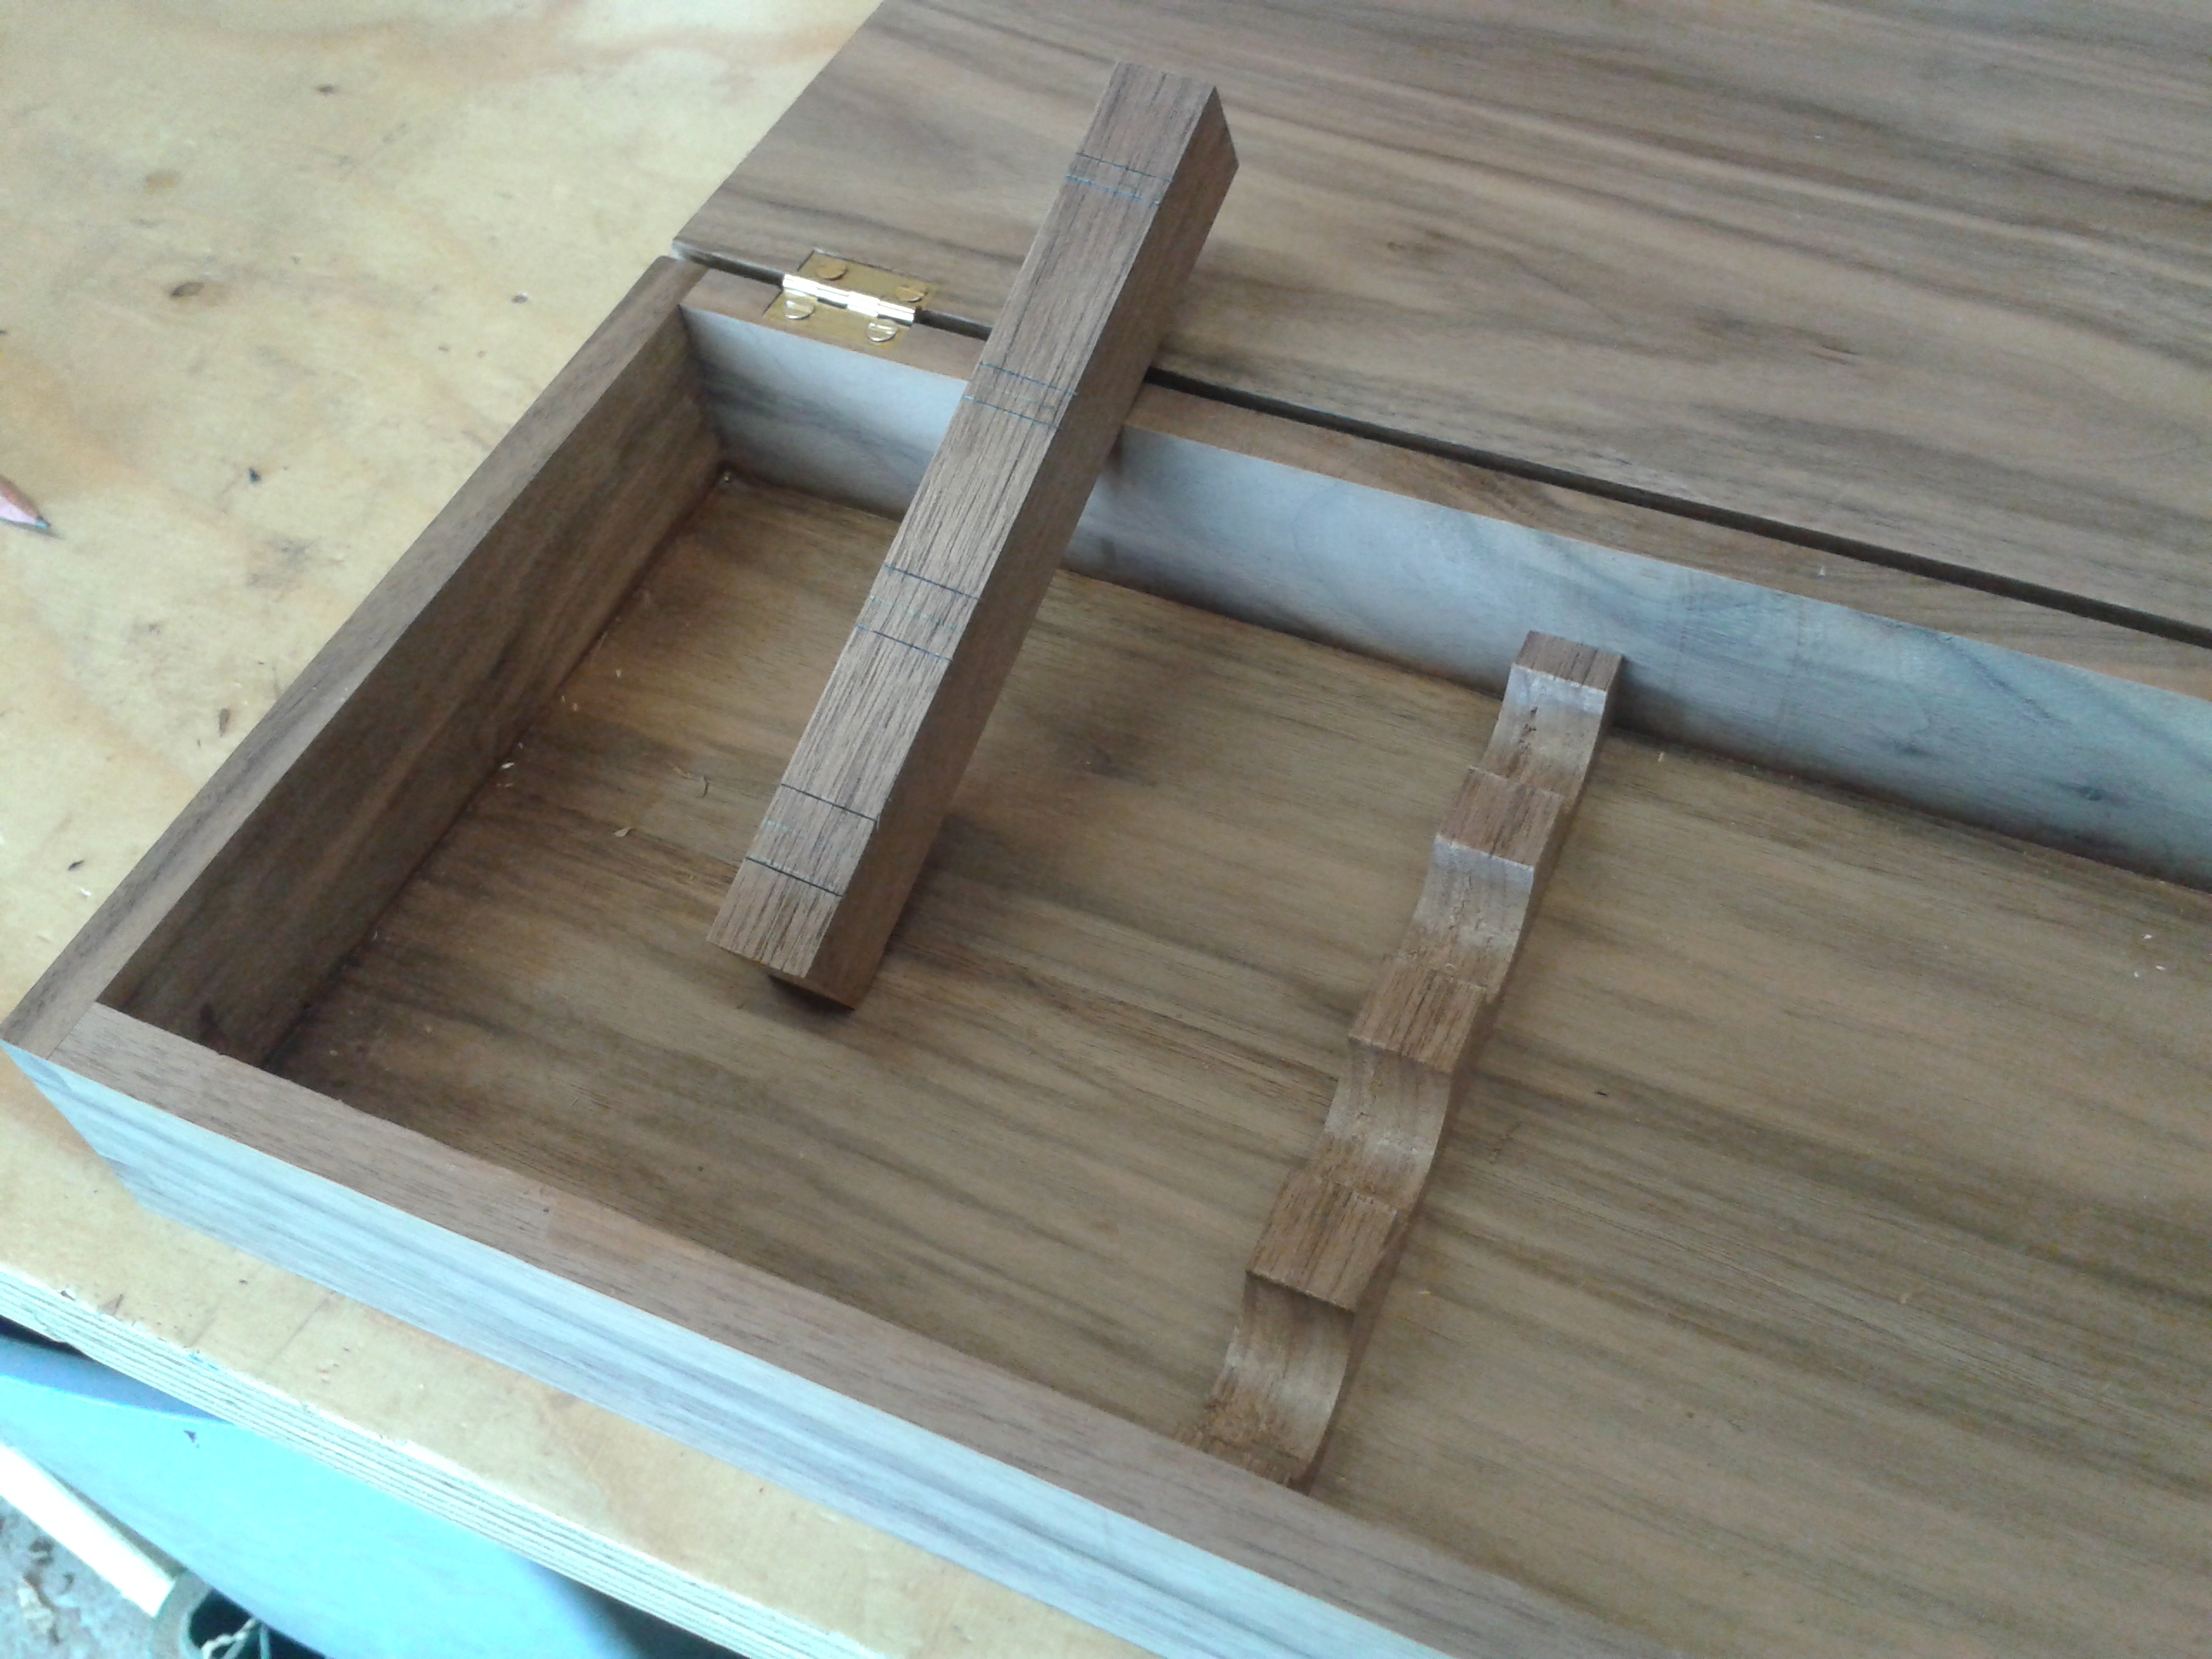
For the box itself I used up some thin walnut stock, but it was not quite wide enough so for the lid and base so I had to laminate two pieces together. The apparent strength of this glue joint always amazes me.
I used dovetail joinery (again!) and brass hinges and screws for the lid. The catch is the same type I used for my dowel box. I also made two notched racks for the four chisels to sit in, one rounded for the handle ferrules, and one squared for the blades. The latter was notched with different widths for the different sizes of chisel.

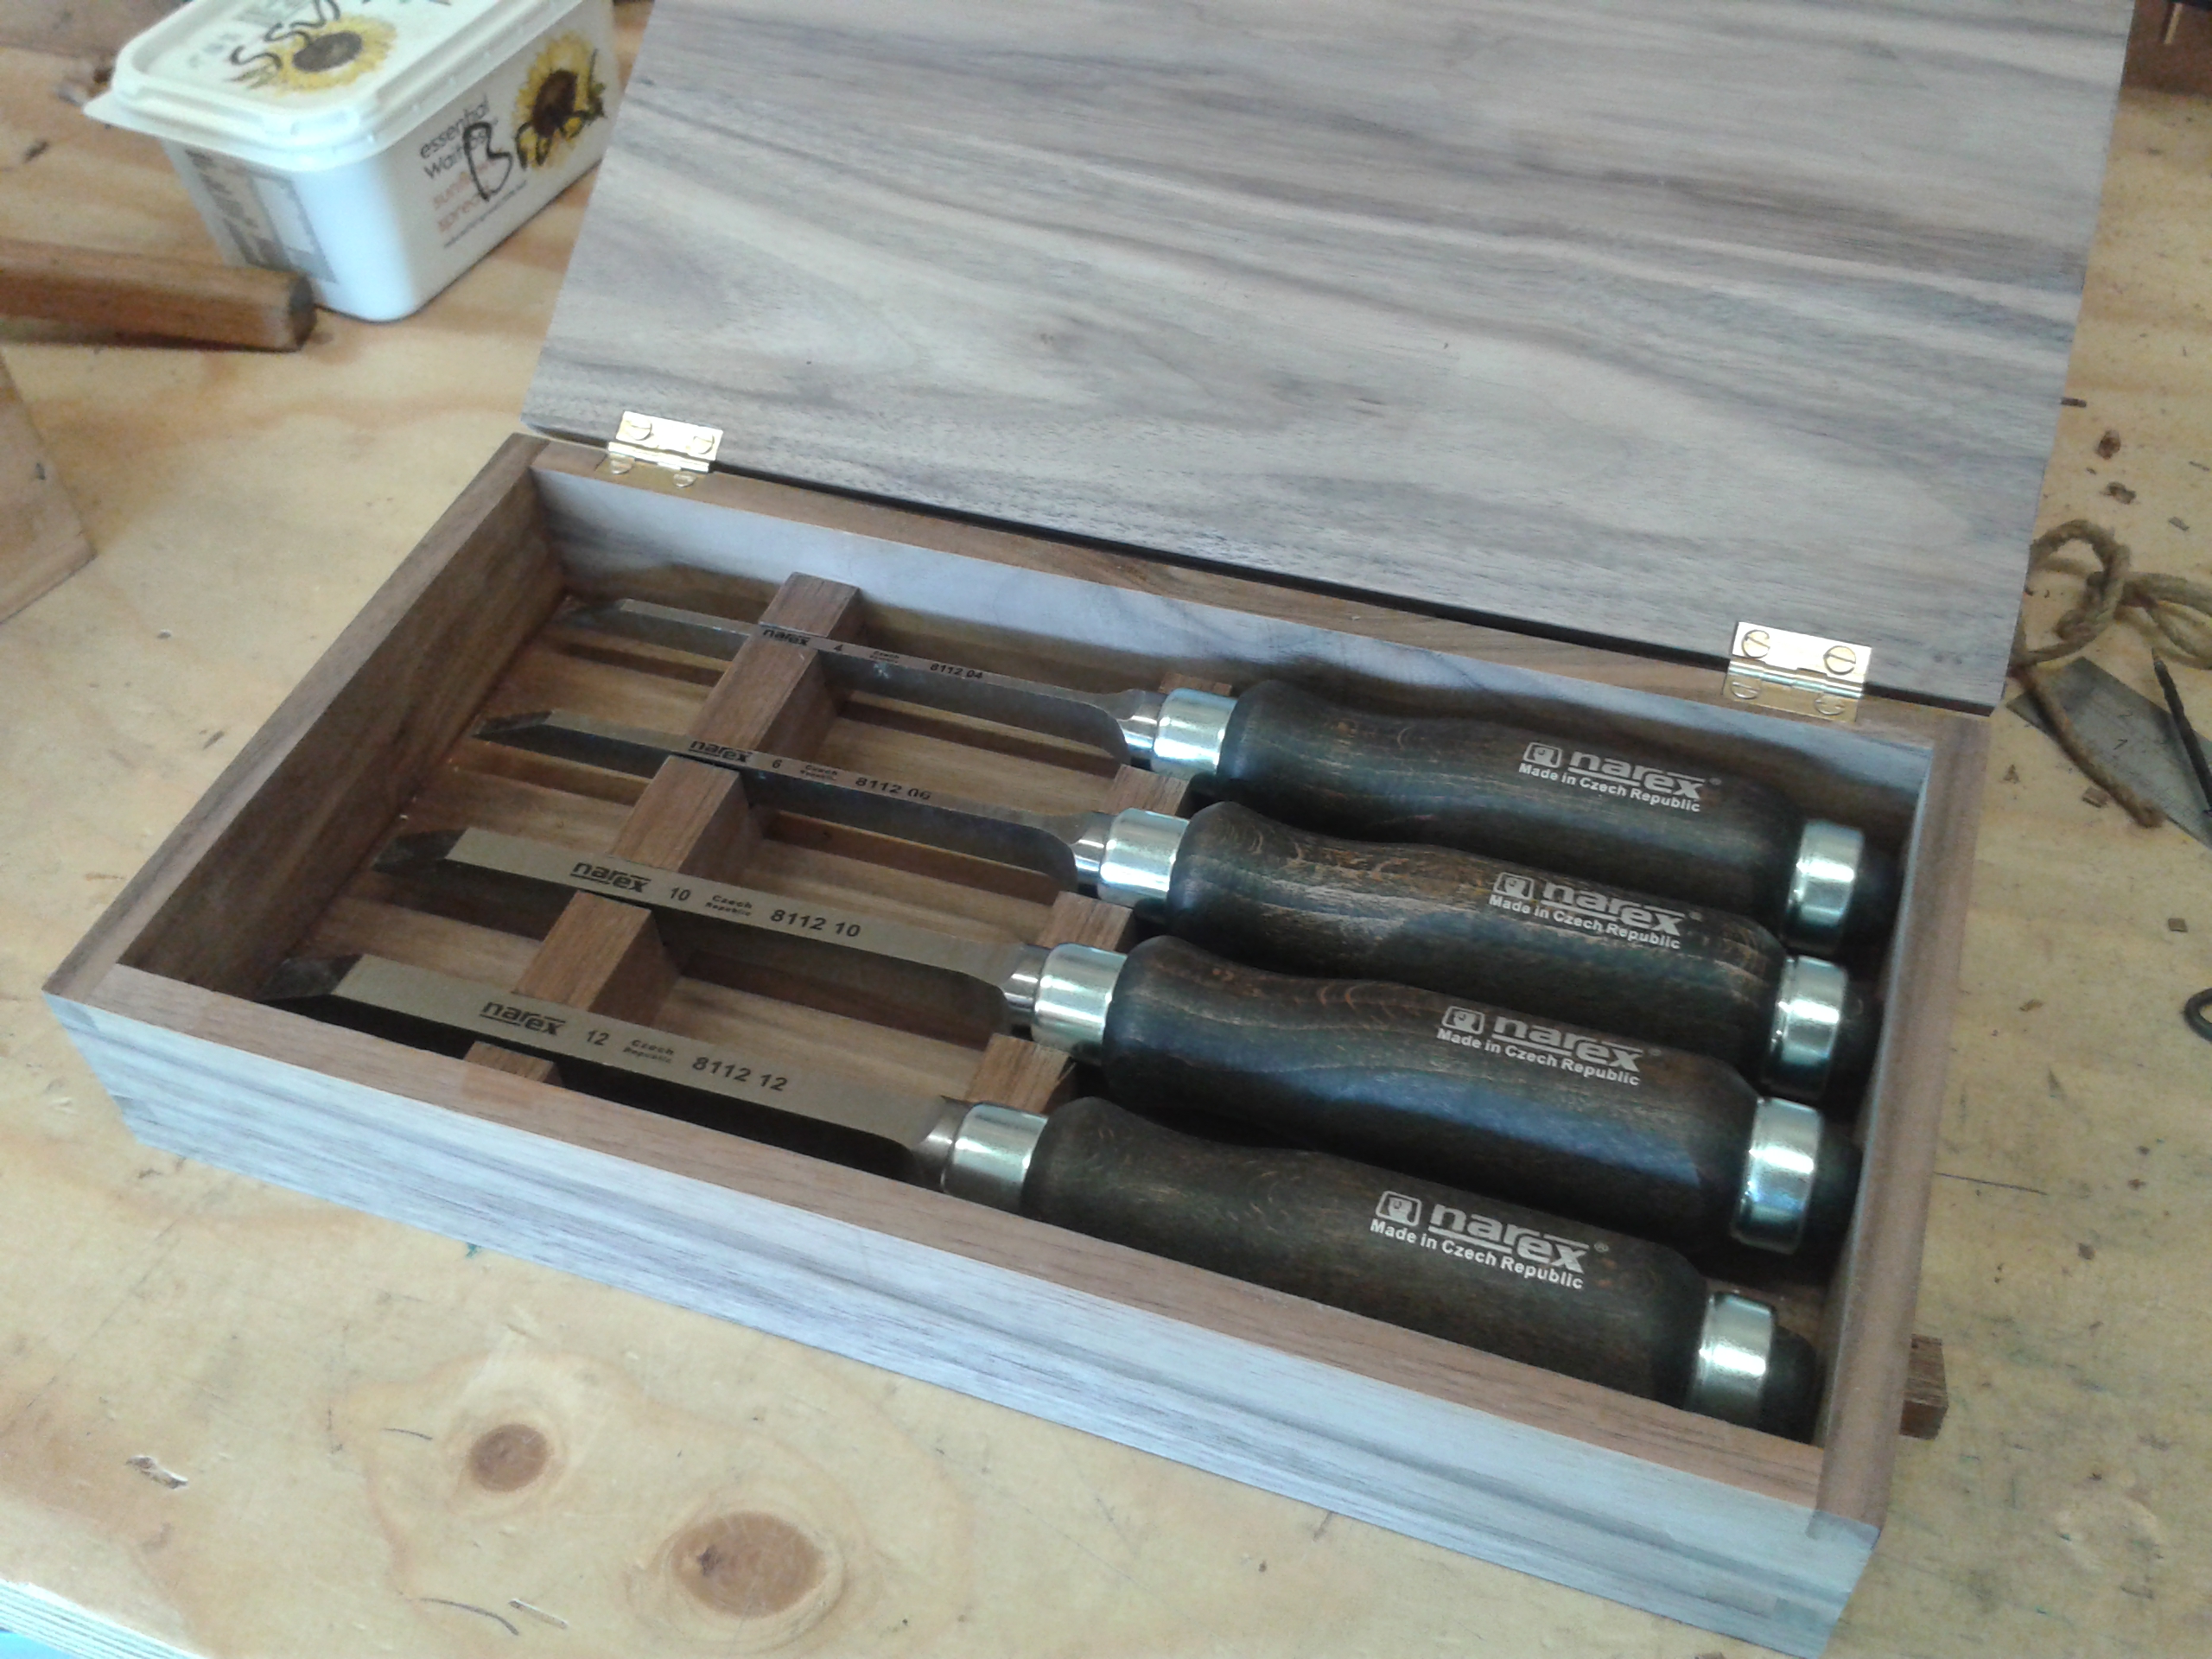
The box that my bench chisels came in has a soft liner in the base and foam strip in the lid to stop the chisels from moving when the box is closed. I wanted to try and replicate this as much as possible and so I fell back on a habit of mine that has, in the past, caused more than a little marital strife. Now, I wouldn’t exactly call myself a hoarder, but I do have a tendency to hang onto seemingly useless things in case they are needed for future projects, and this tendency does make me the butt of a few jokes from goatgirl. However, what causes the marital strife is when I am well and truly vindicated, and the true gift of my prescience is made delightfully apparent. This is what happened in this case.


I masked off the areas where the liners and foam strip would adhere to, and applied three coasts of shellac and some finishing wax. For the liner I used some small offcuts of self-adhesive underlay left over from when I put down a wooden floor in the hallway. For the foam strip I found the protective packaging that my set of Sabatier kitchen knives came in, that I thought looked useful and set aside in case I might need them one day. Ahh, being right – it happens so seldomly, I’d almost forgotten how good it feels! I believe the last time it happened was during the Clinton administration.
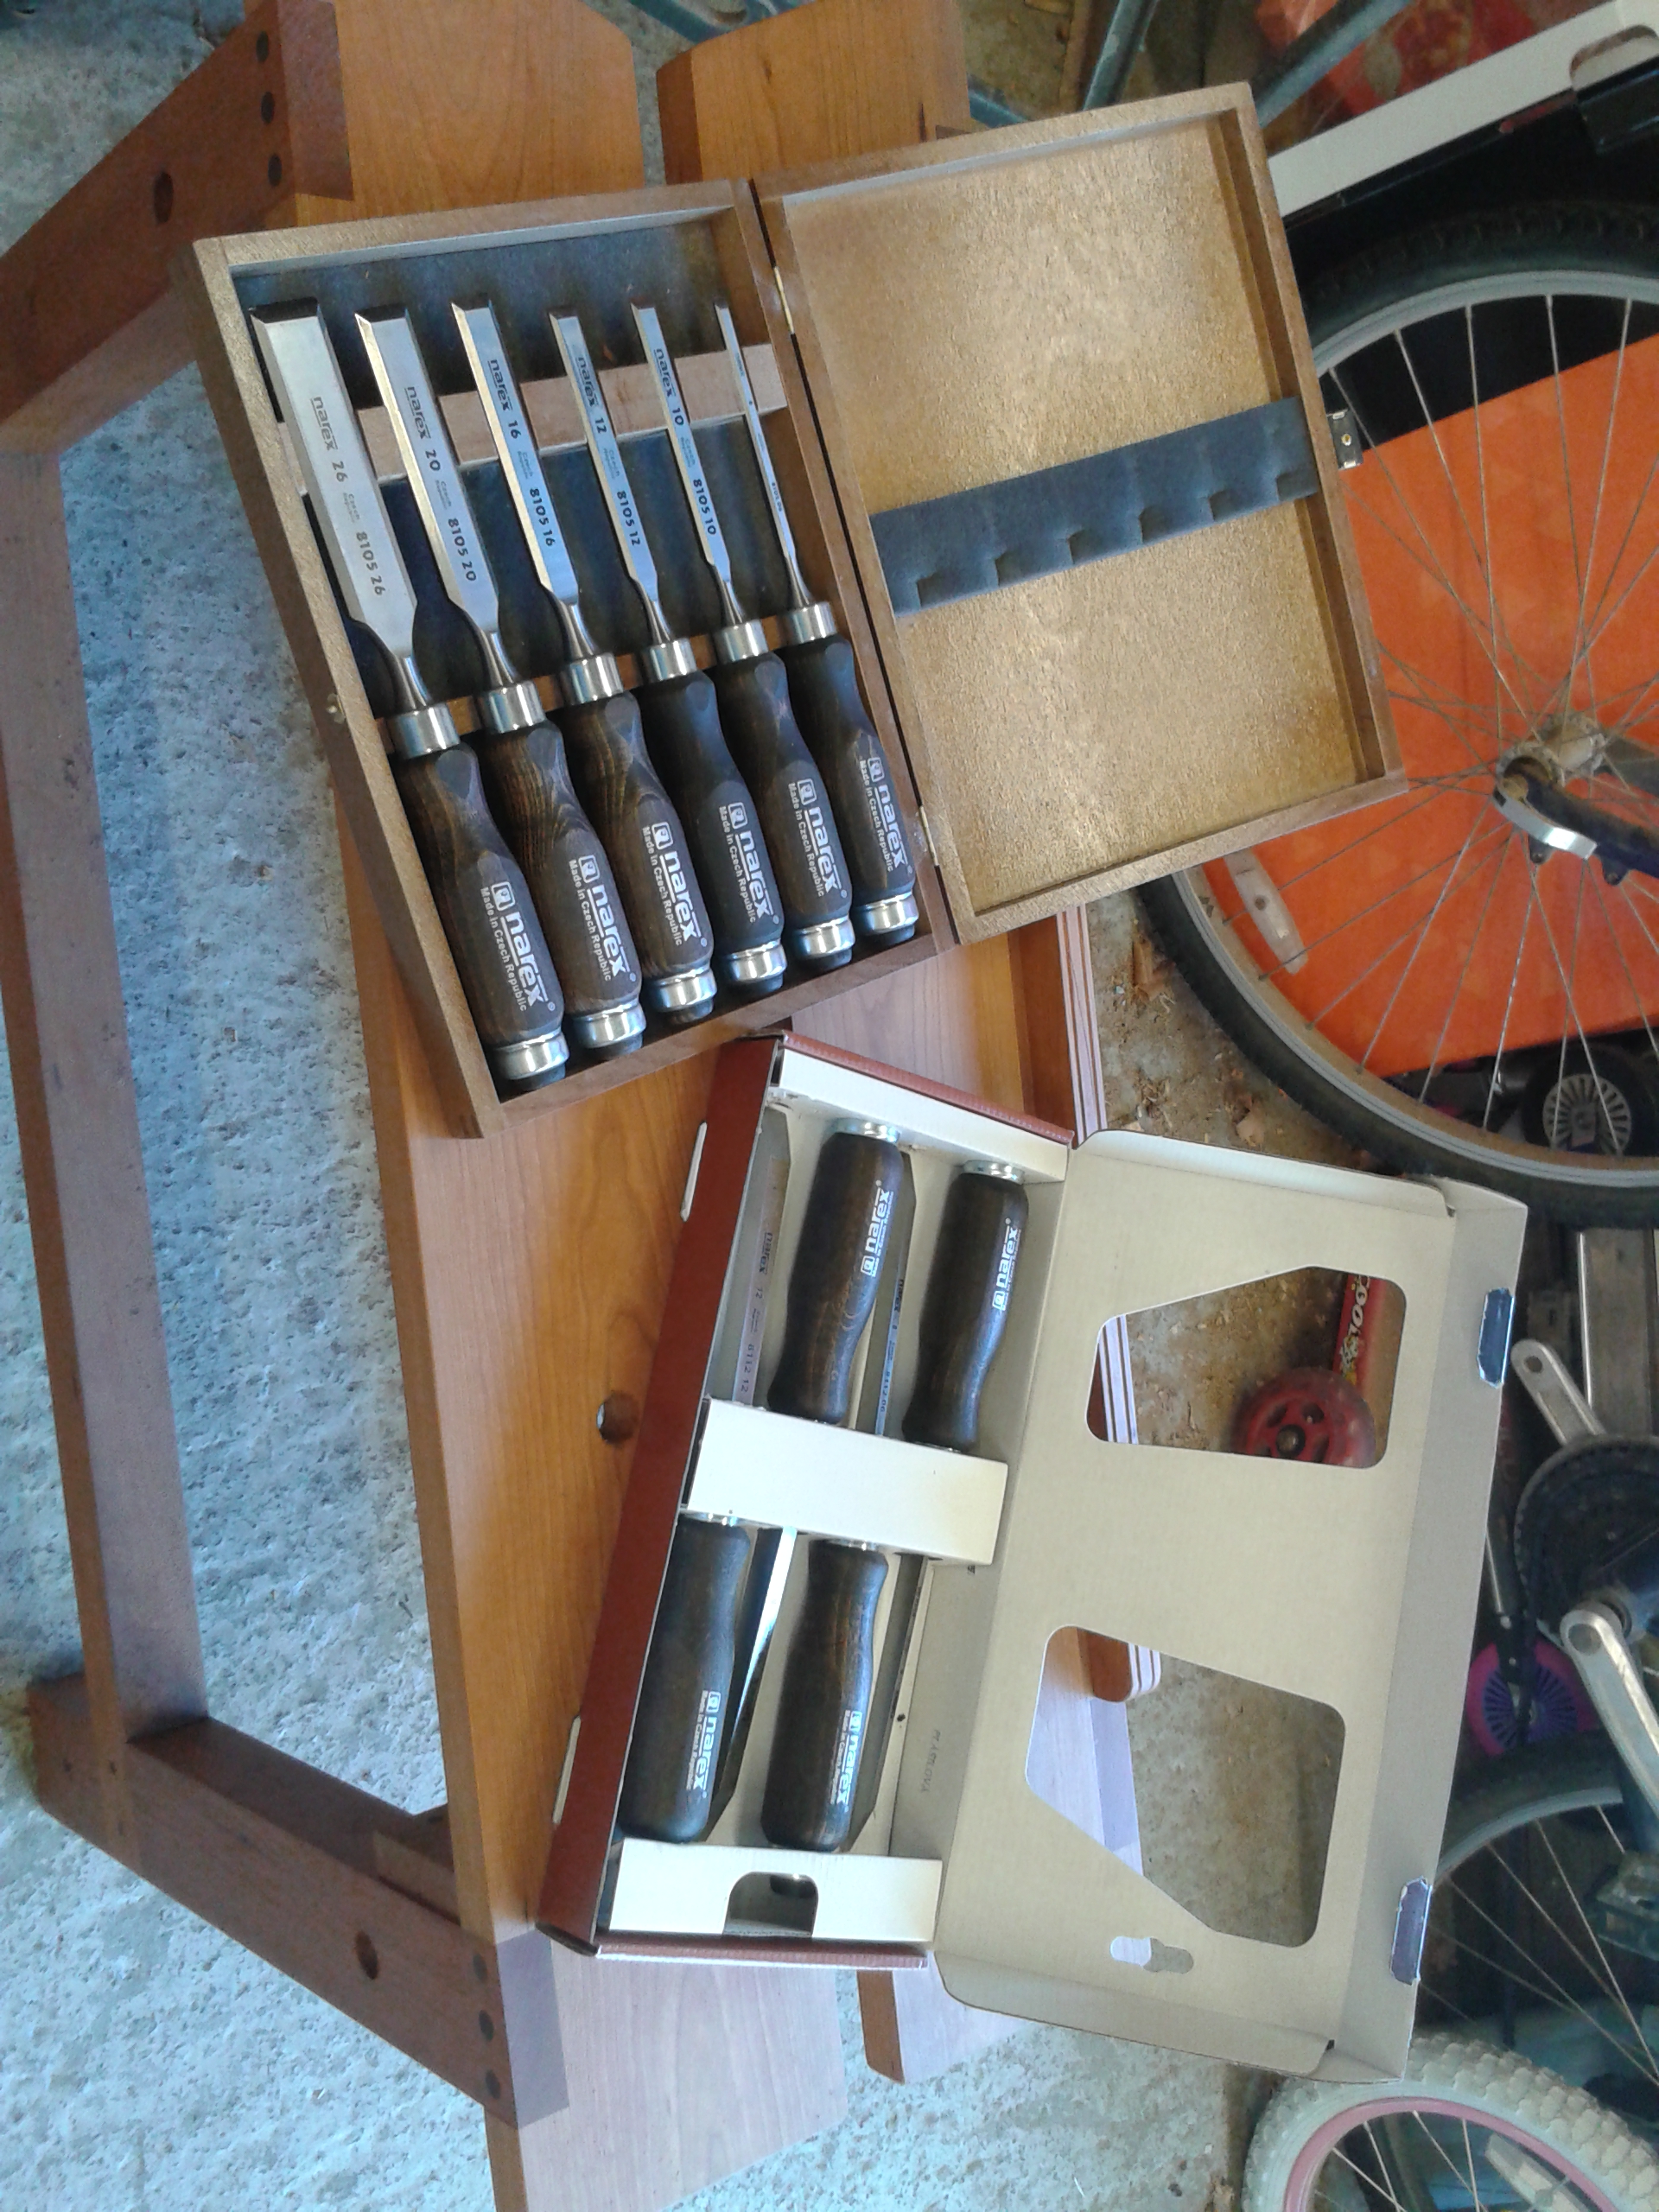

I am very pleased indeed with my new chisel box and as you can see from the before and after shots, it is a much more suitable packaging solution than the cardboard travesty they arrived in. I am however left with one problem, and I will need your advice on this one. I think I’ll leave it for a future post though. Some people might not make it all the way to end of this one and I need to reach as many of you as possible. I’ll be back in a couple of days.


Nice job on that chisel box. I own a few of those Narex mortise chisels and have been banging at them for the last few years without any “ill effects” on them whatsoever. Good steel, good chisels.
And being from your kids, I”m sure they will becomes even more precious.
Glad to have found your blog
Cheers
Bob
LikeLike
Thanks very much.
I am going to be posting about the chisels again quite soon as I am not sure how I am going to sharpen them. I would be grateful for your advice.
Stu
LikeLike
HI Stu
The best advice I can give you about sharpening your mortise chisels (or any sharp edge really) is to not fret about the exact angles. The angles you see listed here and there are really more of a starting point than an absolute. The actual angle that work for you and your tool varies according to the type of wood you work with and your work methods. A shallower angle (says 25), gives you better penetration in the wood, but a 30 degrees angle would resist crumbling better and longer.
Solution? Many would sharpen at the primary bevel at 25 and add a 30 micro bevel on the edge.
Mortise chisels takes a pounding, hence why the micro edge to reinforce the tip of the edge. You do not need much of a land of steel to effect big changes at the tip.
As to sharpening them, free hands is pretty easy since you have a large registration face ( bigger than regular BE chisels) You can actually use a good old Eclipse clone jig, just rest the blade on the rods. Yes that would changes the angle since it sit lower, but all you have to do is eyeball on a flat surface when the bevel sit flat. Record that distance, or better yet, make a setting board and you are all set. To raise the angle, just insert a small shim between the jig and the chisel edge to reset the jig.
See my post back in May on this
http://thevalleywoodworker.blogspot.ca/2015/05/fettling-and-using-my-new-side-clamping.html
Hope this answer your question, if not just, ask away.
To resume, angles bandied around are simply a rough guide, in the end, it is whatever angle that work for you and your chisel in your work. I often tweak my angles as I go, depending how my chisel edge react.
Cheers
Bob, the Valley woodworker
LikeLiked by 1 person
Thanks for that Bob. I will give my honing guide another try.
gb
LikeLike